Shopify
The integration of Wompi with Shopify allows stores in Colombia to receive online payments easily and securely. With this plugin, you can enable multiple payment methods such as credit cards, debit cards, transfers, PSE, Nequi, and more. Now, in addition to the traditional plugin, you can also enable card payments directly within the Shopify checkout, without redirecting the customer to another page. This improves the shopping experience, reduces friction, and increases your conversions.
Receive payments in Shopify with the official Wompi plugin
With the official Wompi integration for Shopify, you can accept online payments from your customers in Colombia quickly, securely, and without complications.
Our plugin connects your Shopify store with Wompi so you can receive payments through multiple methods such as:
- Credit and debit cards.
- Transfers via PSE.
- Payments with Nequi and Daviplata.
- Bancolombia QR and Bancolombia Button.
- Cash through banking correspondents.
- and more.
This integration method uses a redirect payment flow: when the customer confirms their purchase, they are taken to Wompi’s secure gateway to complete the payment, and then automatically return to your store with the confirmation.
Below you’ll find the step-by-step guide to install and configure the plugin, as well as the technical requirements to start selling online with Wompi and Shopify.
Install plugin here
Installation
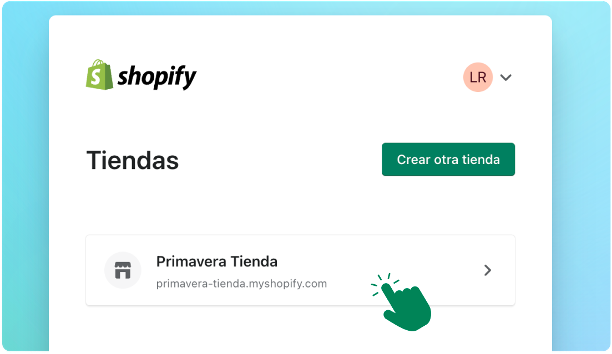
Go to this link to log in and select your store.
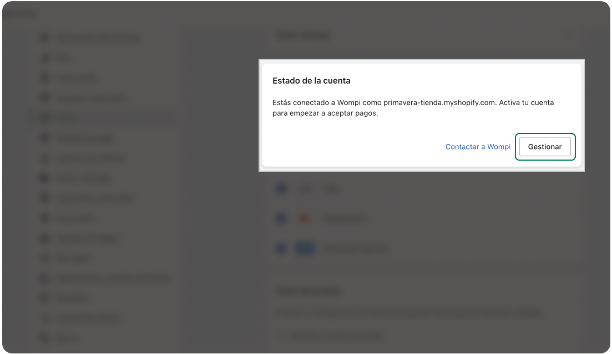
The configuration page to add payment methods will open, by default it will bring up the Wompi method, click the Connect button located at the bottom right.
Click the Install App button at the top of the screen.

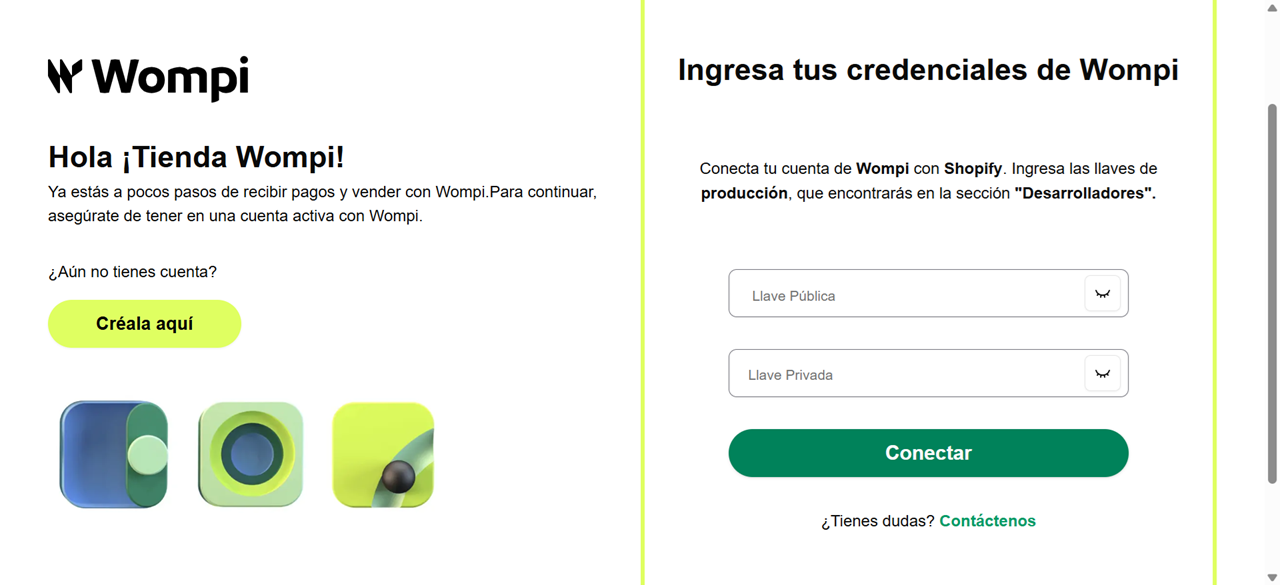
Next, you’ll be redirected to the integration onboarding. Enter your production credentials first and click the Connect button.
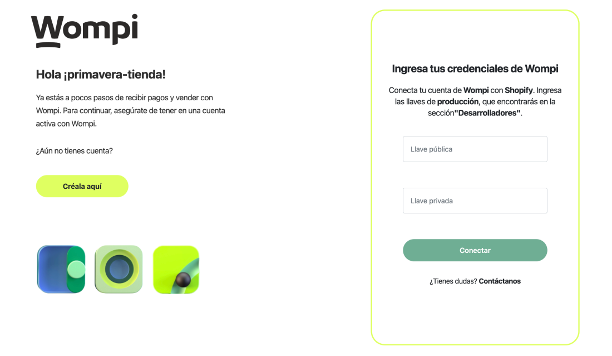
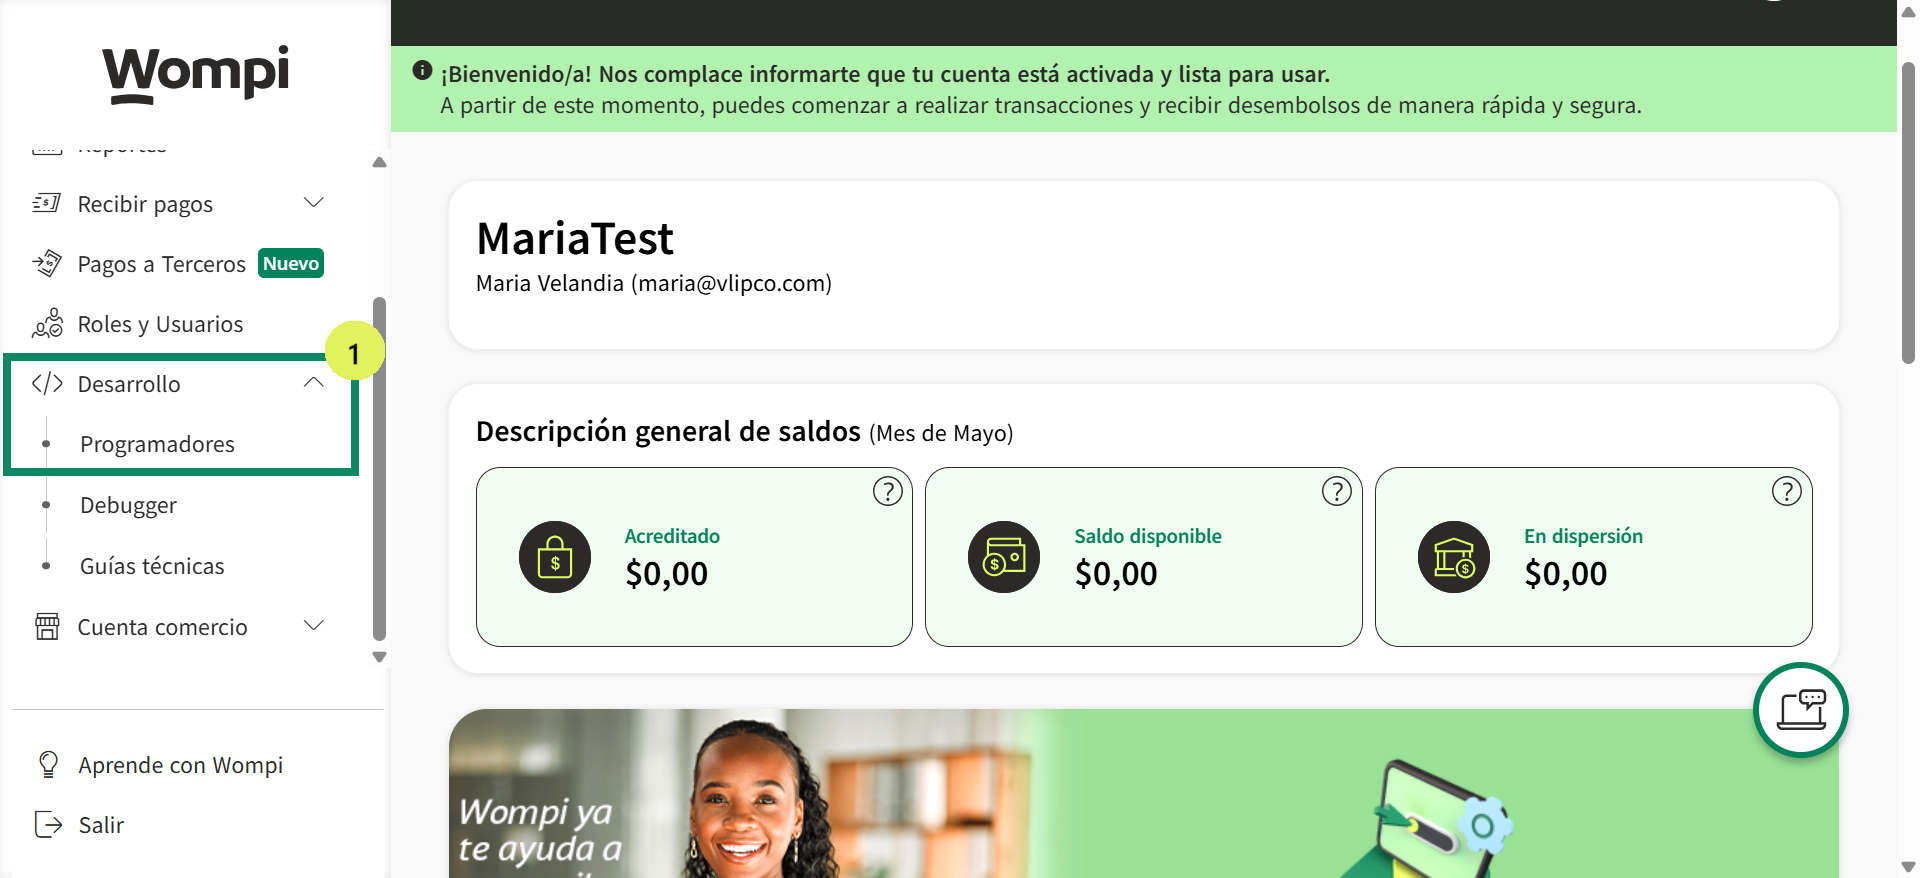
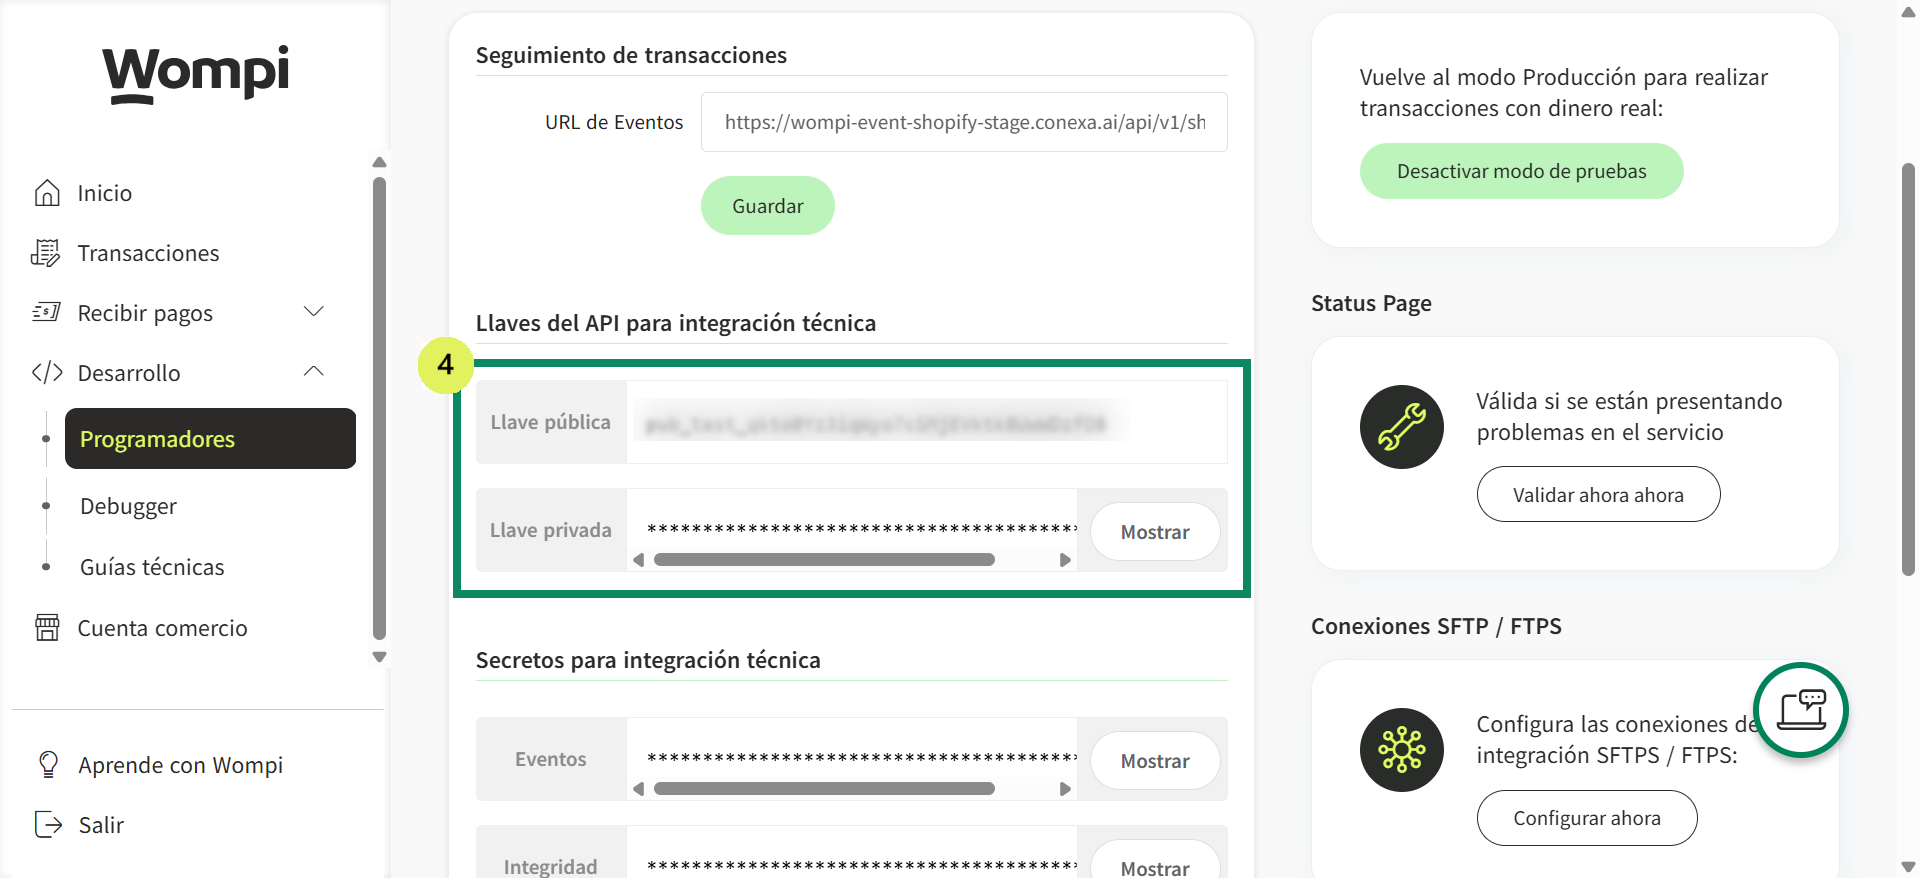
- If you don’t have them, here’s how to find them: First, log in to the Wompi merchant dashboard, then go to the Development > Developers section in the left-hand menu and get the public and private keys for both production and test environments.
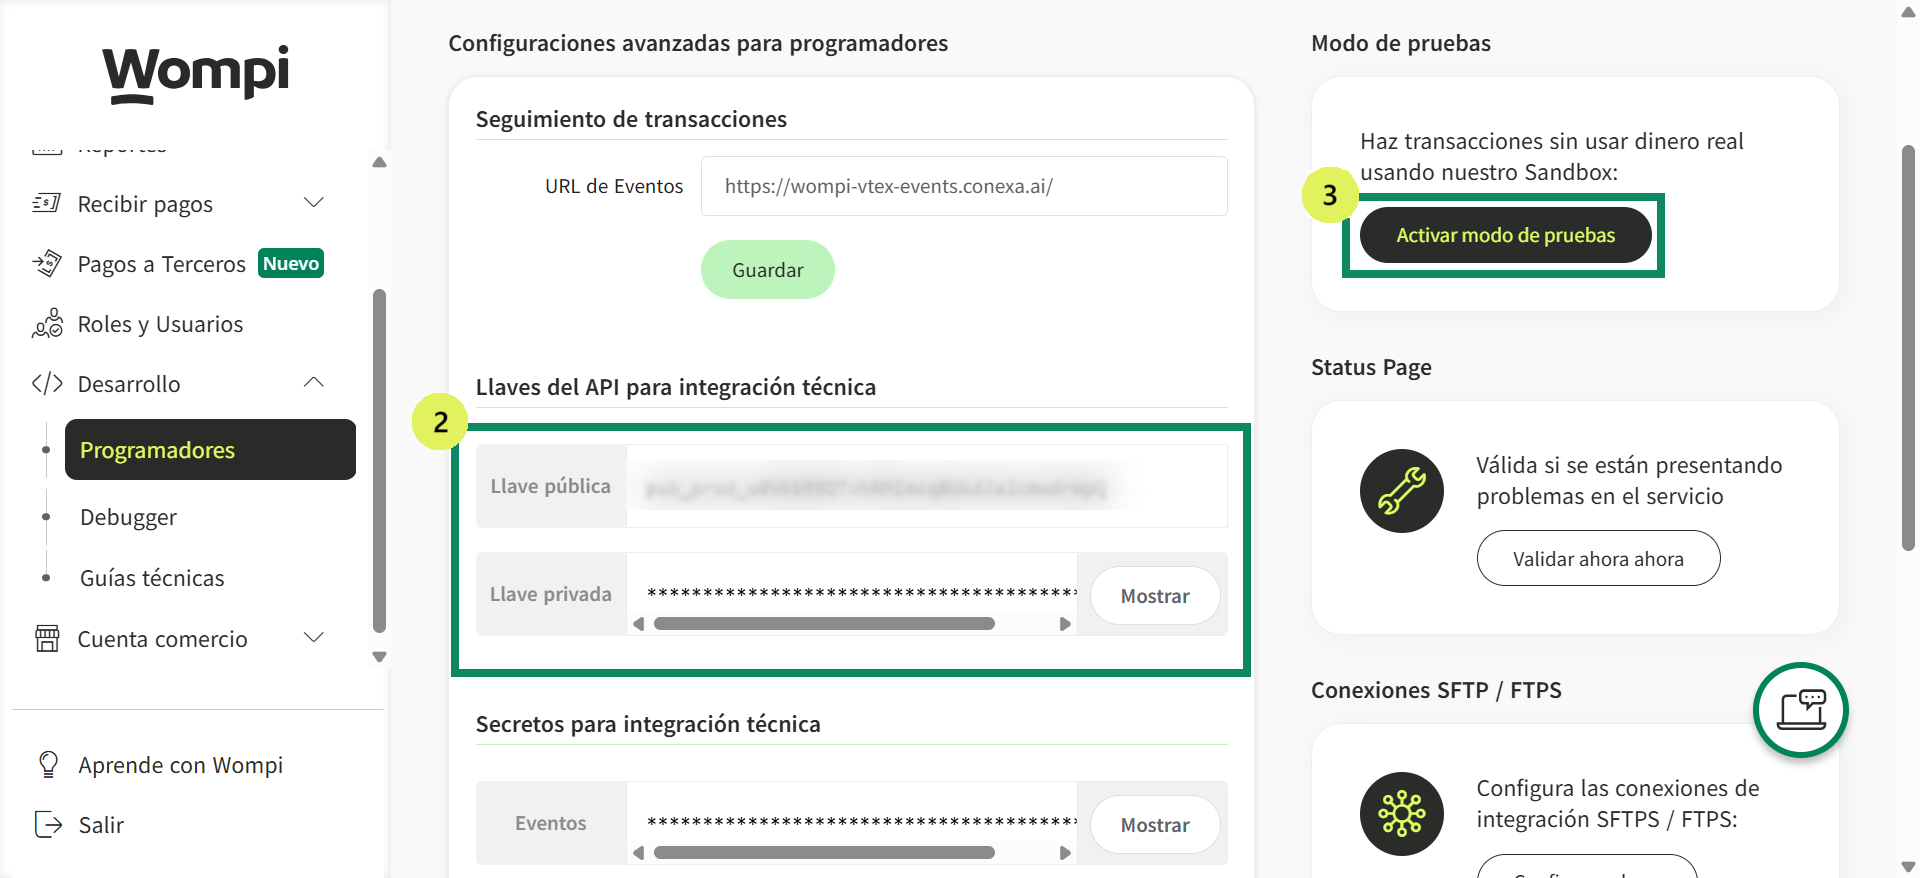
We will notify you that the connection has been successfully established so you can continue the process. Click the Understood button.

Enter your test credentials and click the Connect in test mode button. If you entered valid credentials, you will be redirected to the Wompi configuration inside Shopify.

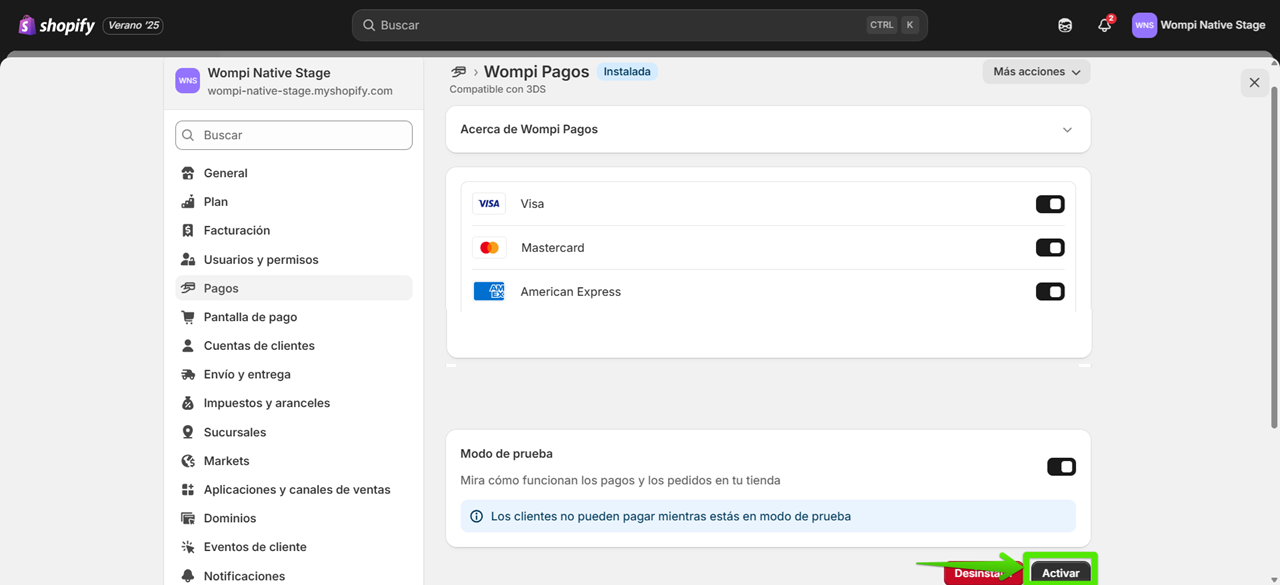
You will then be able to enable the payment methods you want to display at checkout. You can also enable or disable test mode. Once you finish the configuration, click the Activate button.
⚠️IMPORTANT: Make sure to use your production credentials and not the test (sandbox) ones when switching to the real environment. If you use the wrong keys, payments will not be processed correctly.
Note: if you later wish to change the configuration, you can go to Settings > Payments and locate the Wompi payment method from your store.
Install plugin here
On-site cards: accept card payments directly in your Shopify store
With this new feature, you can allow your customers to pay with a card directly from the Shopify checkout, without leaving your store or going through an external redirect.
This means:
- Fewer steps for the customer.
- Greater control over the payment flow.
- Better user experience.
- Higher conversion rate.
Install plugin here
Below, we explain how to enable this feature, the technical requirements, and the steps to configure it.
Installation
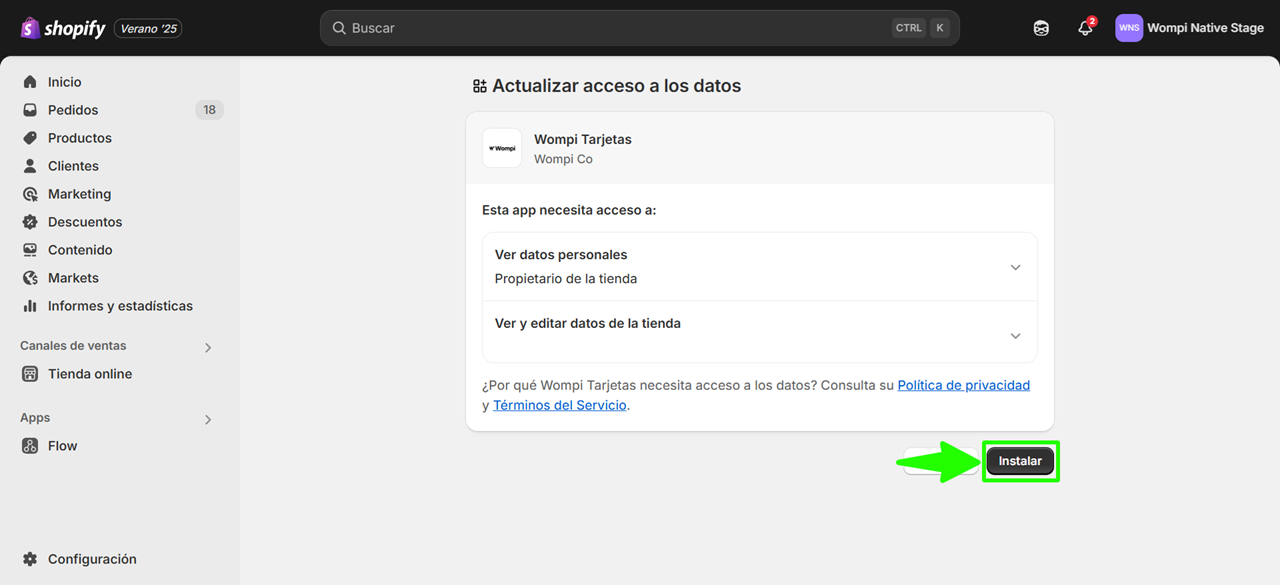
To install Wompi cards in your Shopify store, install the app from this link and click the Open button to continue the process.
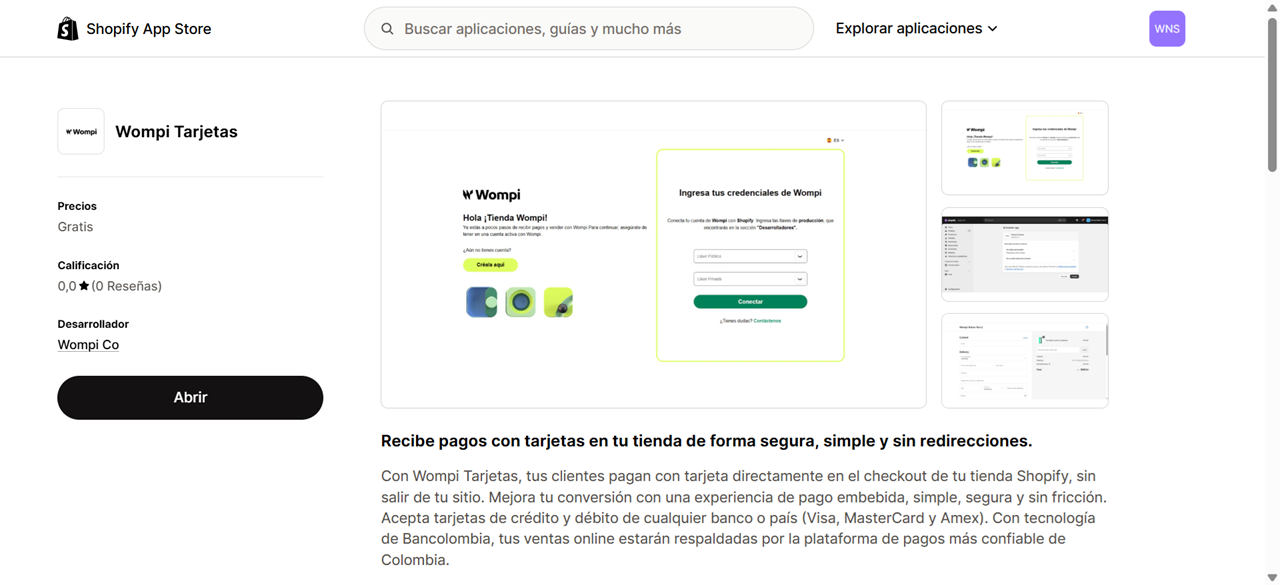
Accept the app permissions by clicking the Install button
Next, you’ll be redirected to the integration onboarding. Enter your production credentials first and click the Connect button.
We will notify you that the connection has been successfully established so you can continue the process. Click the Understood button.
Enter your test credentials and click the Connect in test mode button. If you entered valid credentials, you will be redirected to the Wompi configuration inside Shopify.
You will then be able to enable the payment methods you want to display at checkout. You can also enable or disable test mode. Once you finish the configuration, click the Activate button.
⚠️IMPORTANT: Make sure to use your production credentials and not the test (sandbox) ones when switching to the real environment. If you use the wrong keys, payments will not be processed correctly.
Note: if you later wish to change the configuration, you can go to Settings > Payments and locate the Wompi payment method from your store.
Checkout settings
For the proper processing of transactions made through Wompi, you must make the following settings in your store.
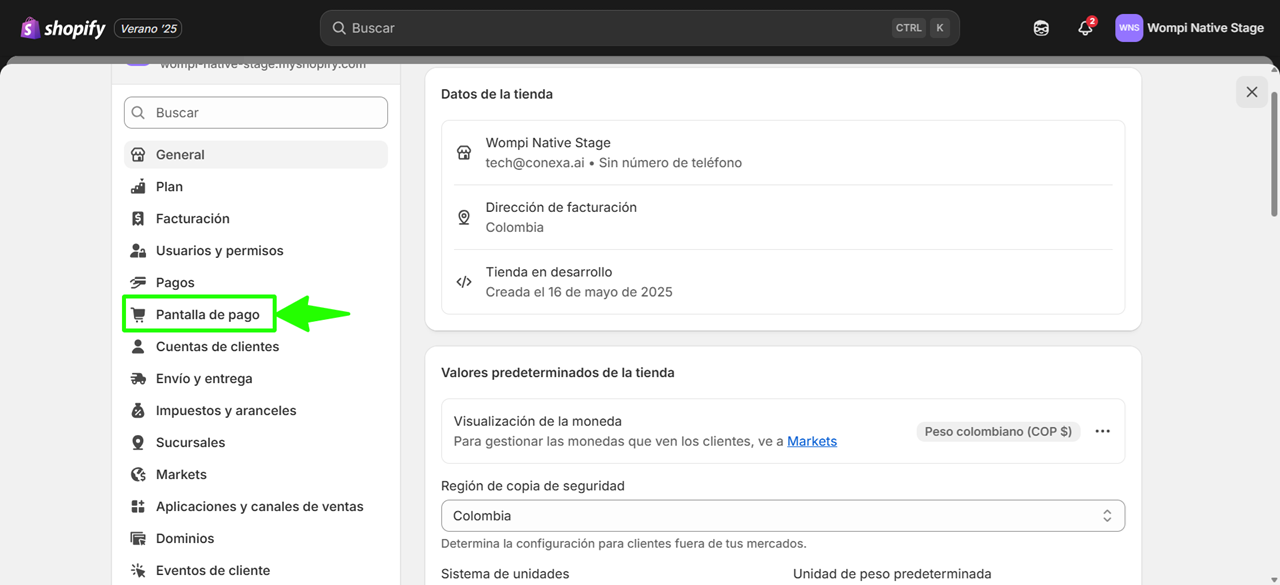
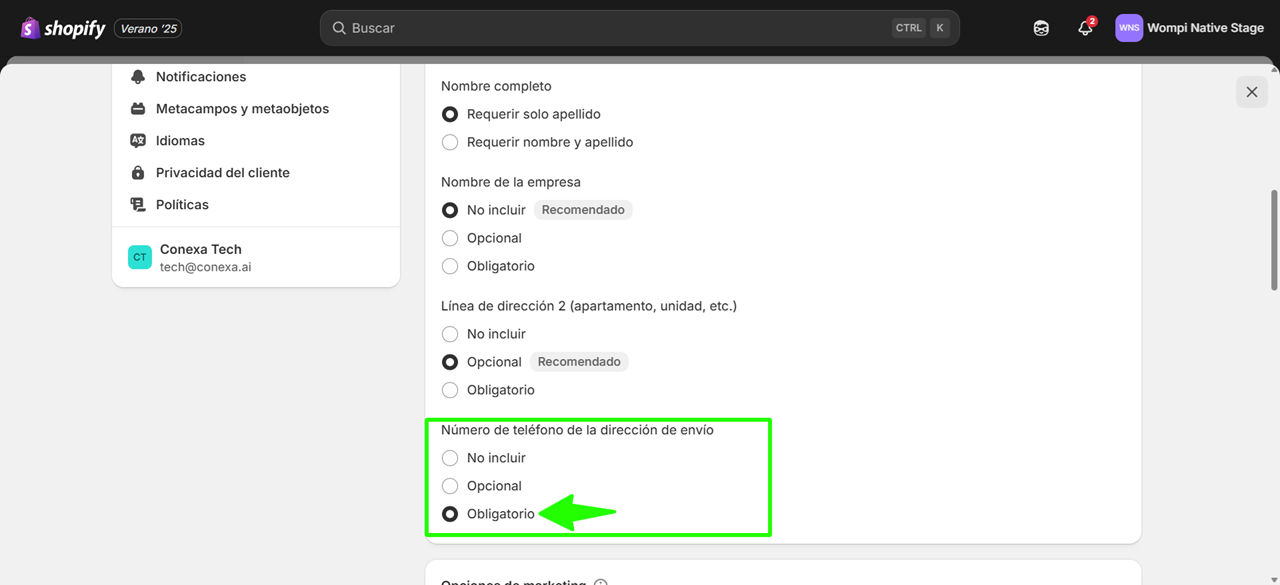
From the Shopify admin go to Settings > Checkout

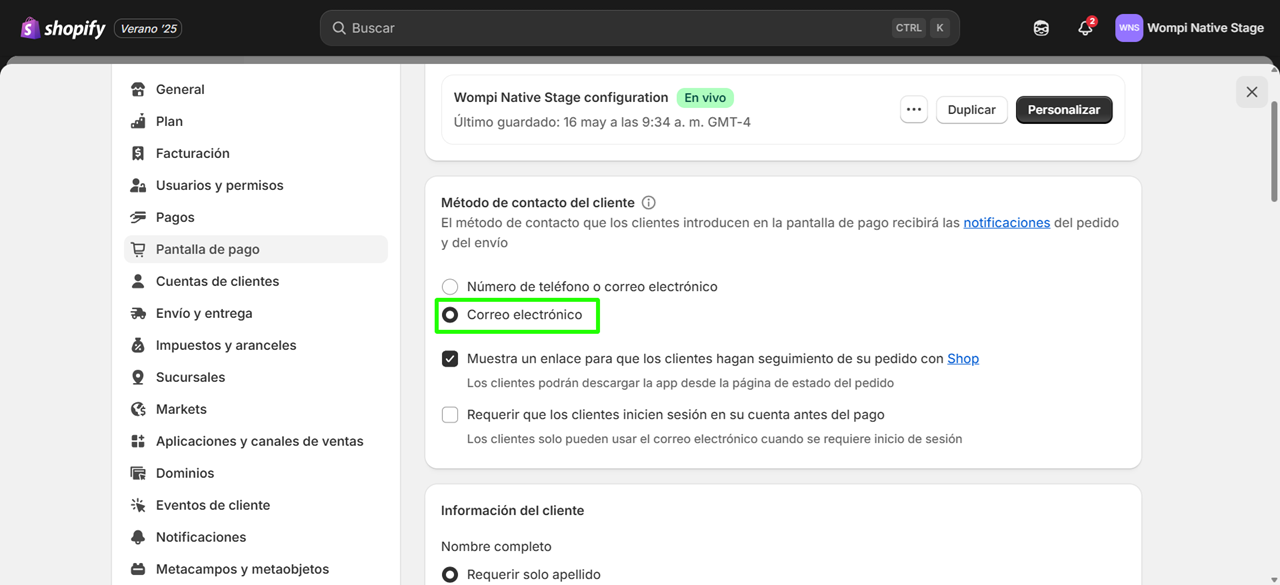
Then in the Customer contact method select the Email option.
Finally, on the same page in Customer information, find the section Shipping address phone number and select the Required option.
Install plugin here
Webhook configuration for status notifications
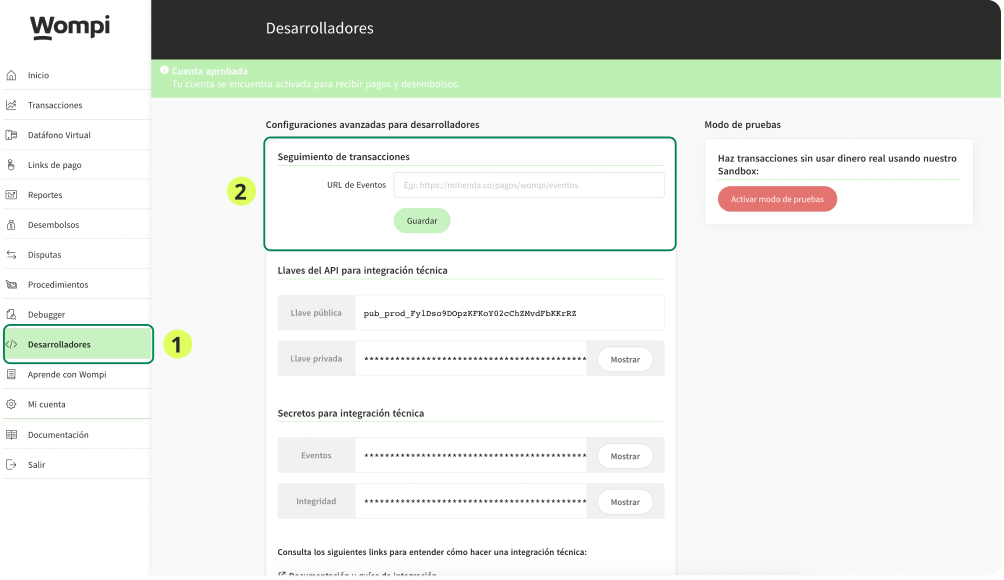
To configure the Events URL and properly receive status notifications, here are the steps:
- Log in to Wompi with your credentials. Then go to the Developers section and find the Transaction tracking option.
- Add the URL https://wompi-event-shopify.conexa.ai/api/v1/shopify/webhooks/event in the Events URL field and click the Save button.
- Then enter test mode and configure the same URL.
Done! The configuration process has been successfully completed.
⚠️IMPORTANT: For the proper functioning of the apps, if you already have the Shopify checkout app configured and then want to configure the Shopify on-site cards app, first configure the webhooks and ensure the correct operation of Shopify checkout, then install Shopify on-site cards and verify its functionality. If you have any questions, contact Wompi.
Usage mode
Shopify checkout
Log in to Shopify and start making transactions; here you will see the Wompi option.
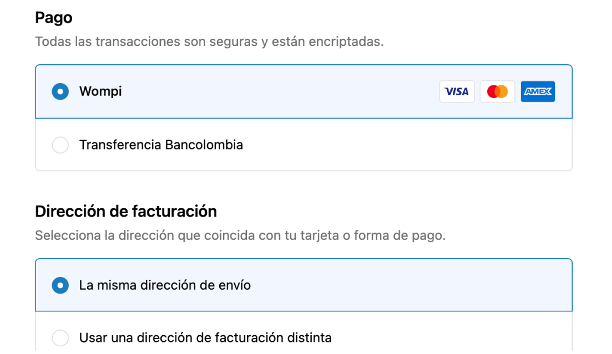
By selecting the Wompi option and clicking the Pay button, you will be taken to the checkout to select your preferred payment method.

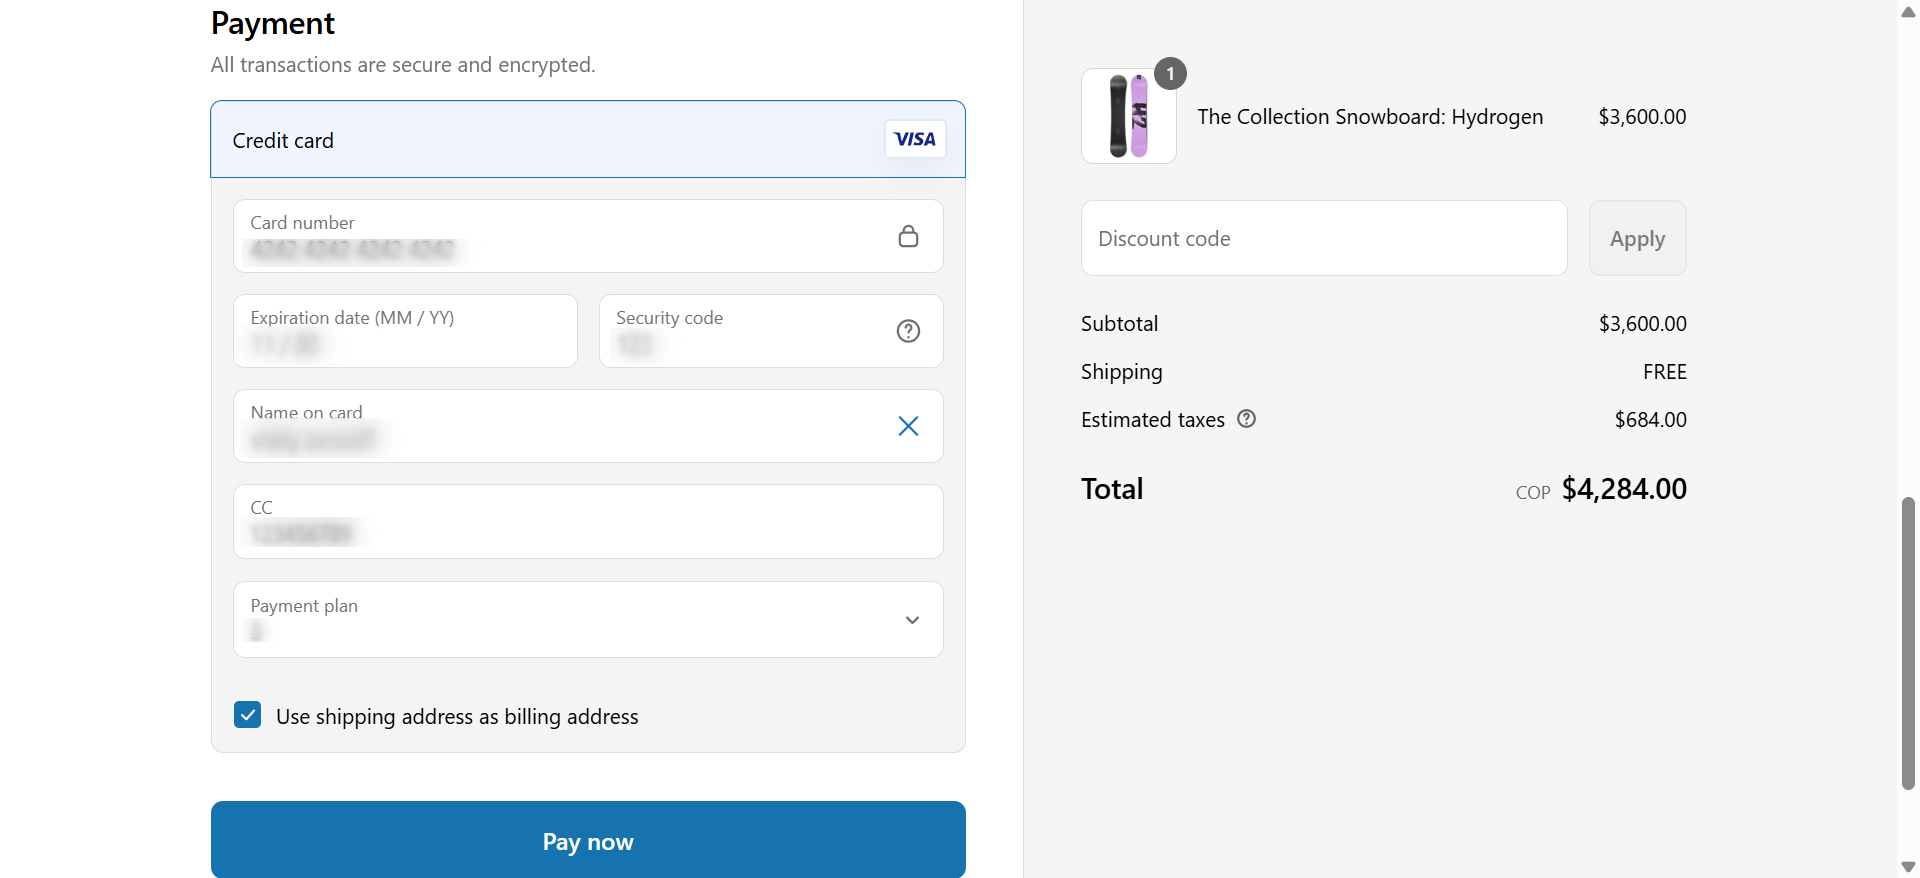
Shopify on-site cards
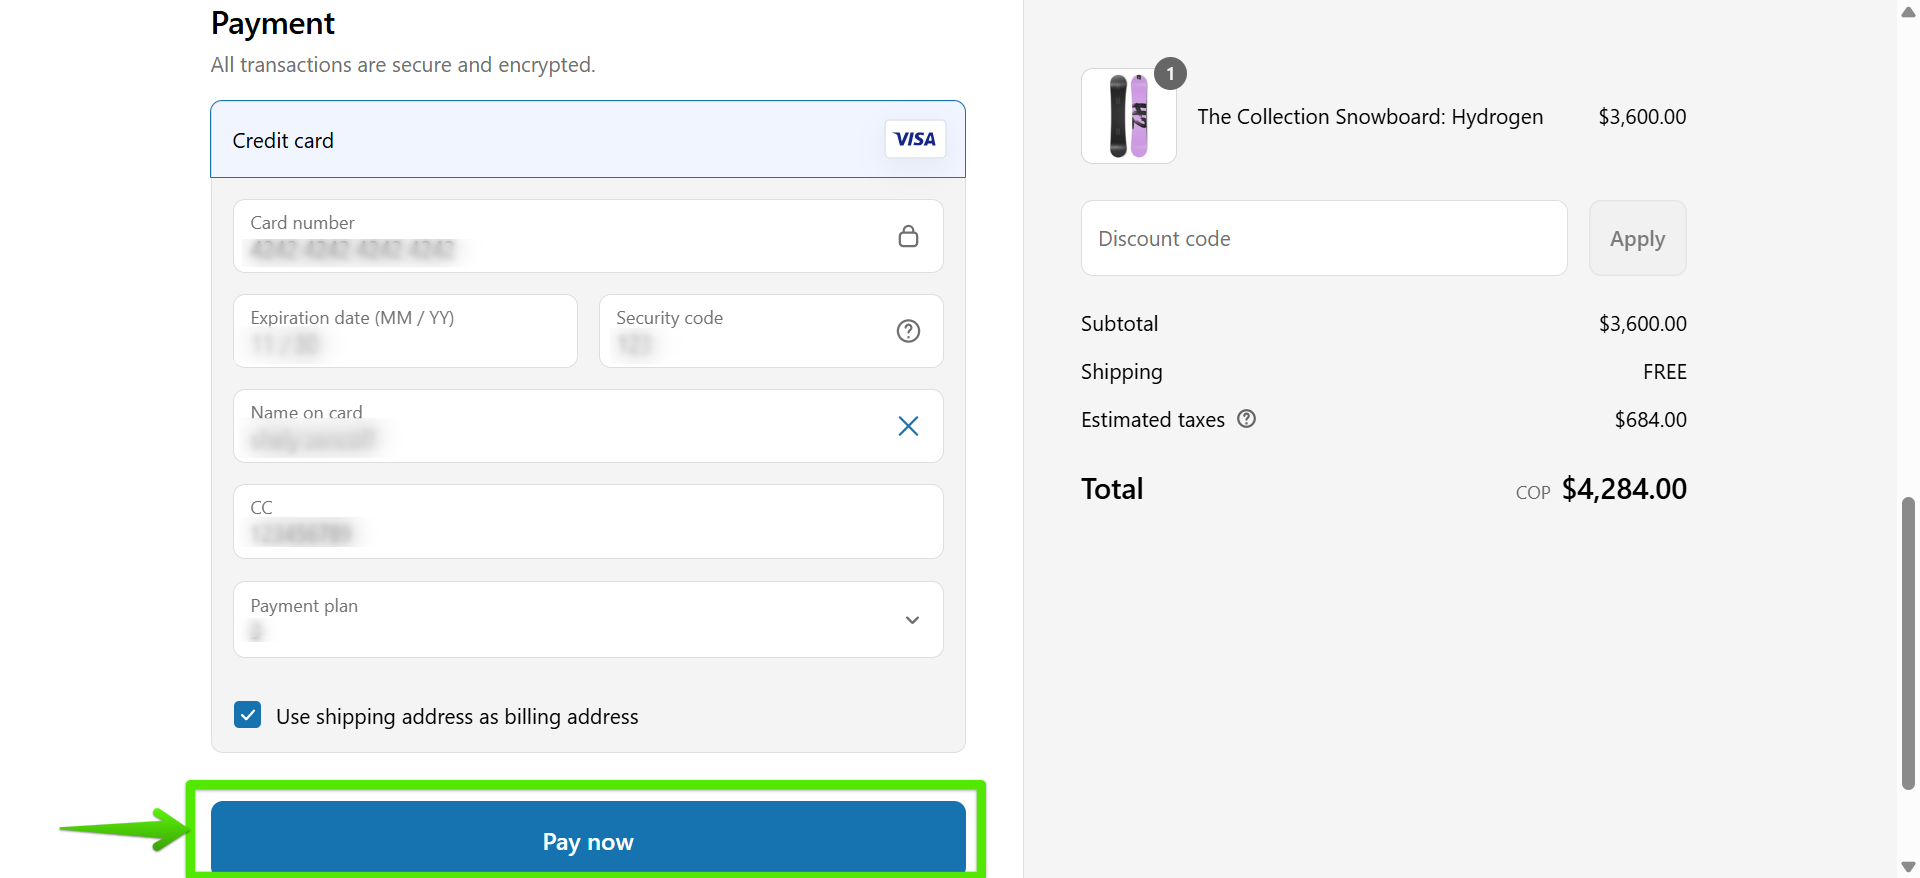
To make a payment, once the product is chosen and added to the cart, in the checkout you will see the card payment option processed through Wompi cards, where you must enter your card details and select your preferred payment plan (installments).

Click the Pay now button to be redirected to the order confirmation.
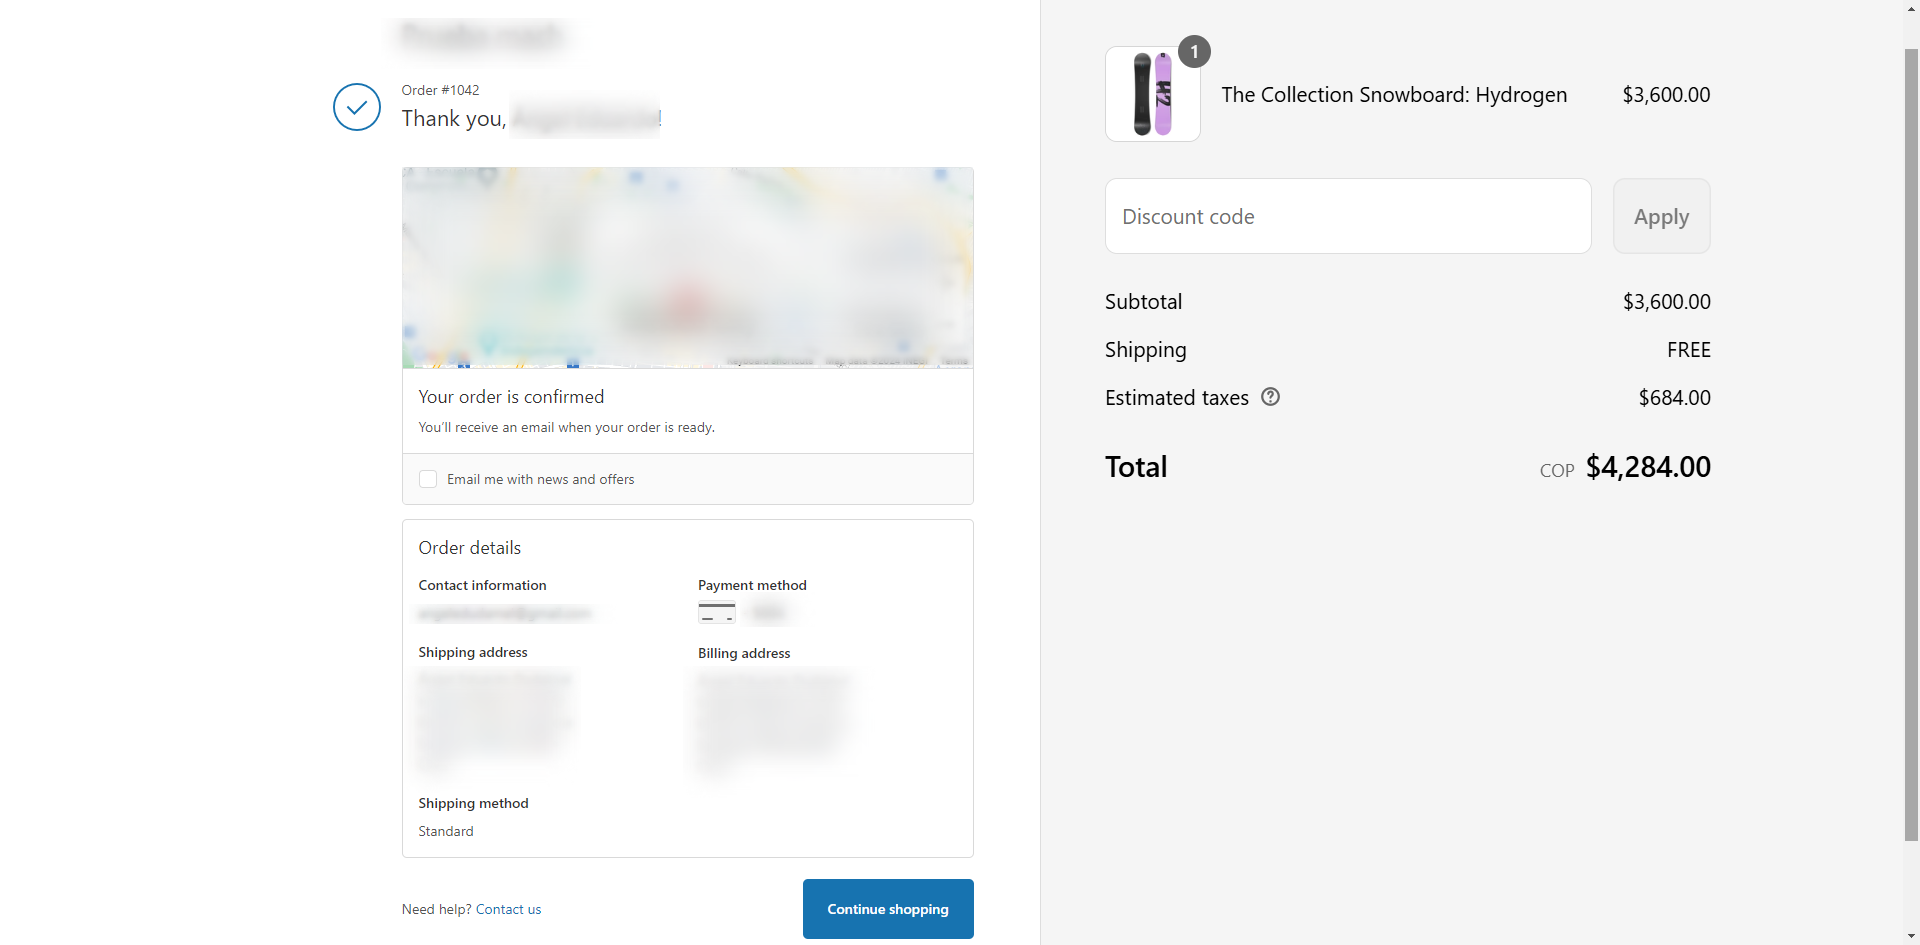
Verification
You can verify the status of your orders on both platforms: Wompi and Shopify.
And that’s it! You can now start selling and receiving your payments with Wompi and Shopify.
Glossary
- Public Key: public key used to identify your store.
- App ID / API Secret: private credentials that allow validating transactions.
- Checkout: process where the customer completes their purchase.
- On-site: means the payment is made directly in your store, without redirection.
- Sandbox: testing environment to validate the integration before activating it in production.
