PrestaShop
Accept payments on your online store in seconds!

Requirements
-
A PrestaShop store in its version 1.7.
-
Have permissions in the PrestaShop administrator to install new modules.
-
Create a Wompi account to have a public key, an event key and integration key, both for the Production environment and Sandbox environment.
-
Have completed the onboarding process, which allows you to process payments with Wompi.
Features
This plugin:
-
Integrate the Widget of Wompi and allows you to accept payments with any of the payment methods available for your business.
-
It can be used to accept real payments (in Production), as well as test payments (Sandbox).
-
Currently, the plugin only supports Colombia's currency (COP) WITHOUT decimals.
General settings
This plugin has new features that allow you to see additional information about your customers. When a transaction is made, you will be able to see the following information about your customers' shipping addresses in your Wompi account:
- Name of the person who receives the product.
- Complete address of your customer with department, city and country.
- Contact Number.
In order to enjoy this, you need to make the following configurations in your store:
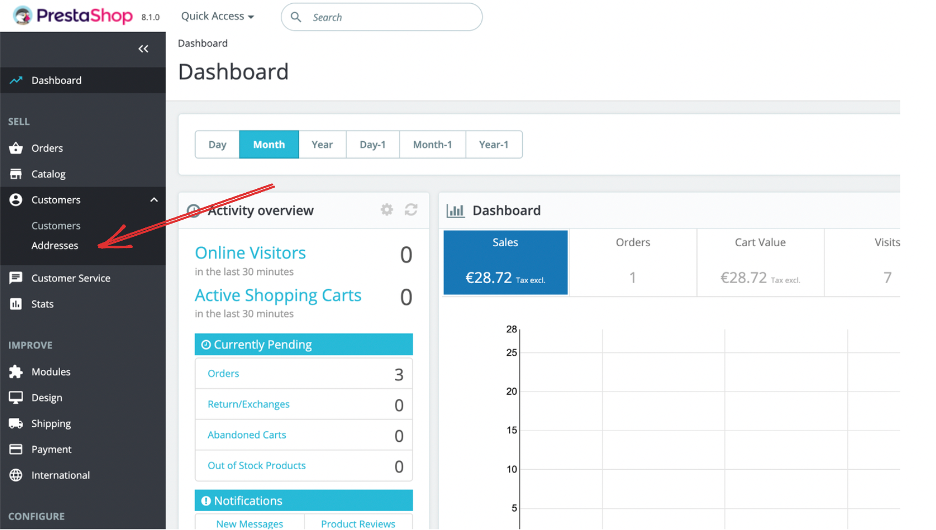
- Go to the left menu in the administrator panel, search in the "SELL" category the Customers option. Two options will be displayed, press "Addresses" as seen in the following image.
- Search for "Set required fields for this section" and click on the button, then select the option “phone” and press on save changes.


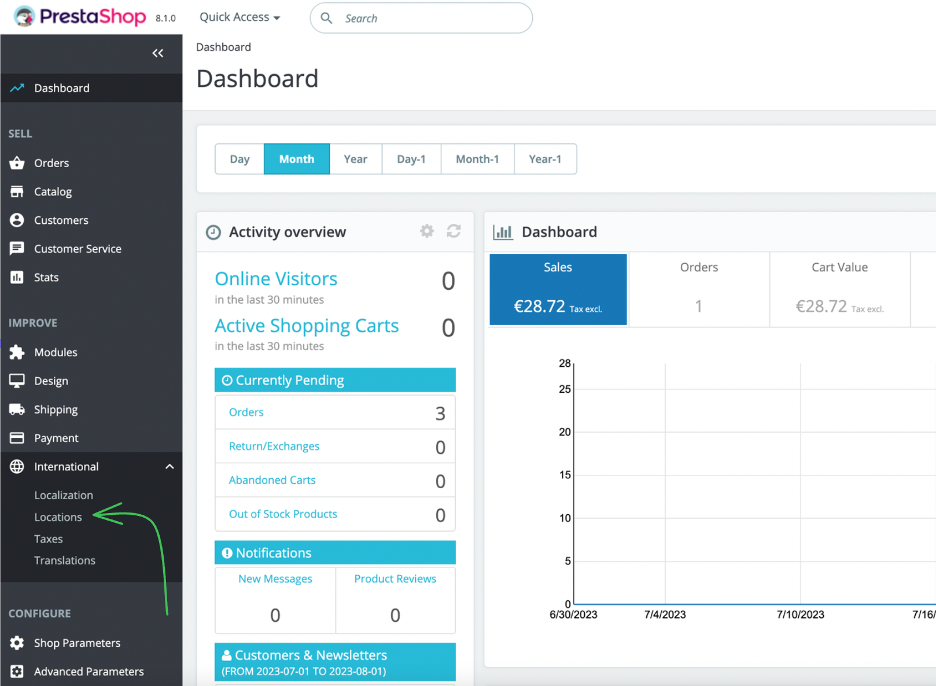
- Now, go to the category “International”, under "Locations".
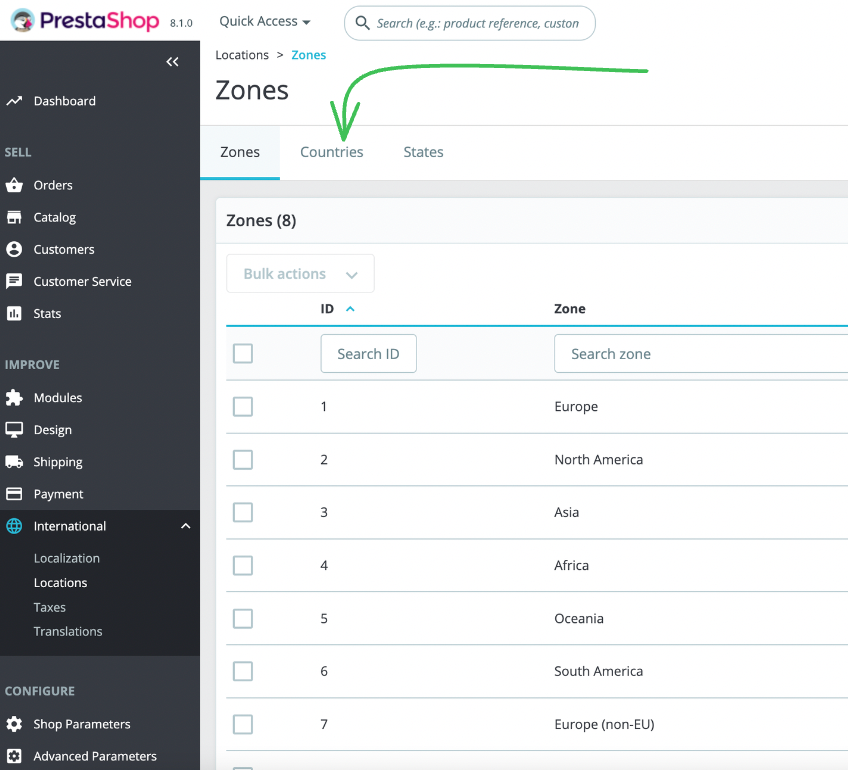
- On this page, click on "Countries". On the search bar, search for "Colombia" or the country you are interested in. When you find the country, click on "Edit".
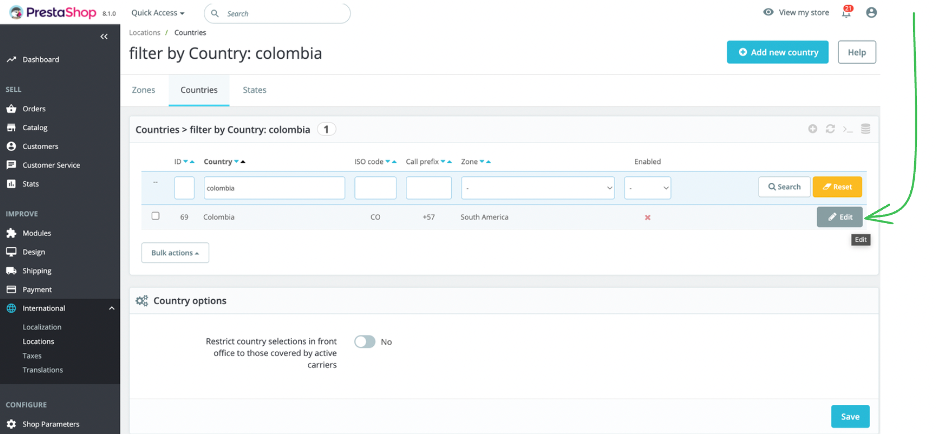
- Being in the modify tab you must do three things:
- In the "Address format" box you must add manually: “State:name”.
- Additionally, in the "Contains states or provinces" selector must be selected the option "YES".
- Finally, select save. You can guide yourself with the following image:

With these steps it is enough for the new functionalities to take effect and the module to work in the best way. If you have questions about how to do this, contact the Wompi team to help you in the process. If you need to enable the states or departments of other countries, repeat step 5 with the country of interest. Don't forget to always save your changes to ensure the changes are accepted by your store.
Installation
-
Find and download the Wompi module at PrestaShop.
-
Go to the administration panel of your store PrestaShop.
-
Go to the section of Modules → Modules Catalog → Upload a Module and upload the ZIP file that you downloaded from the store.
-
Go to the Module Catalog, find the Wompi module and click on install.
-
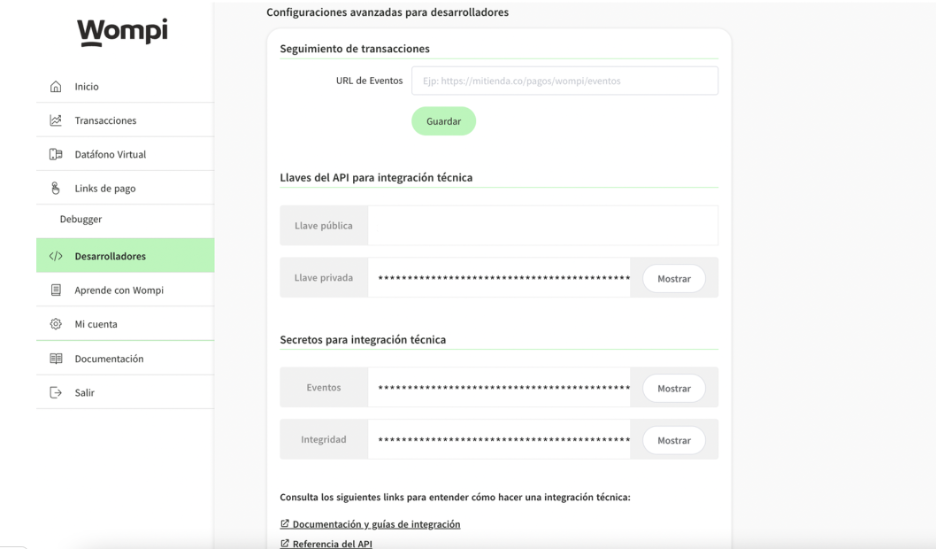
Go to the section Modules → Module Manager and look for the Wompi module then click on configure, and enter the public key that you can obtain in the "My account" section of the Commerce Dashboard. Remember that it is a key for each environment.

- In Wompi's dashbord you must put the event url according to your store domain. Please, follow this format to complete the url: [dominioTienda]/en/module/wompicolombia/recuperar.

Remember to click on save to make sure the url was recognized. It is important to add this URL so that the order status change is visible in the store.
- Start trading!
