Create Payout: Manual
Learn how to manually create a payout by entering each piece of information one by one on the platform. This option is ideal for individual or low-volume payouts without uploading files.
Required permissions
- Roles with permissions to prepare payout orders (preparer role).
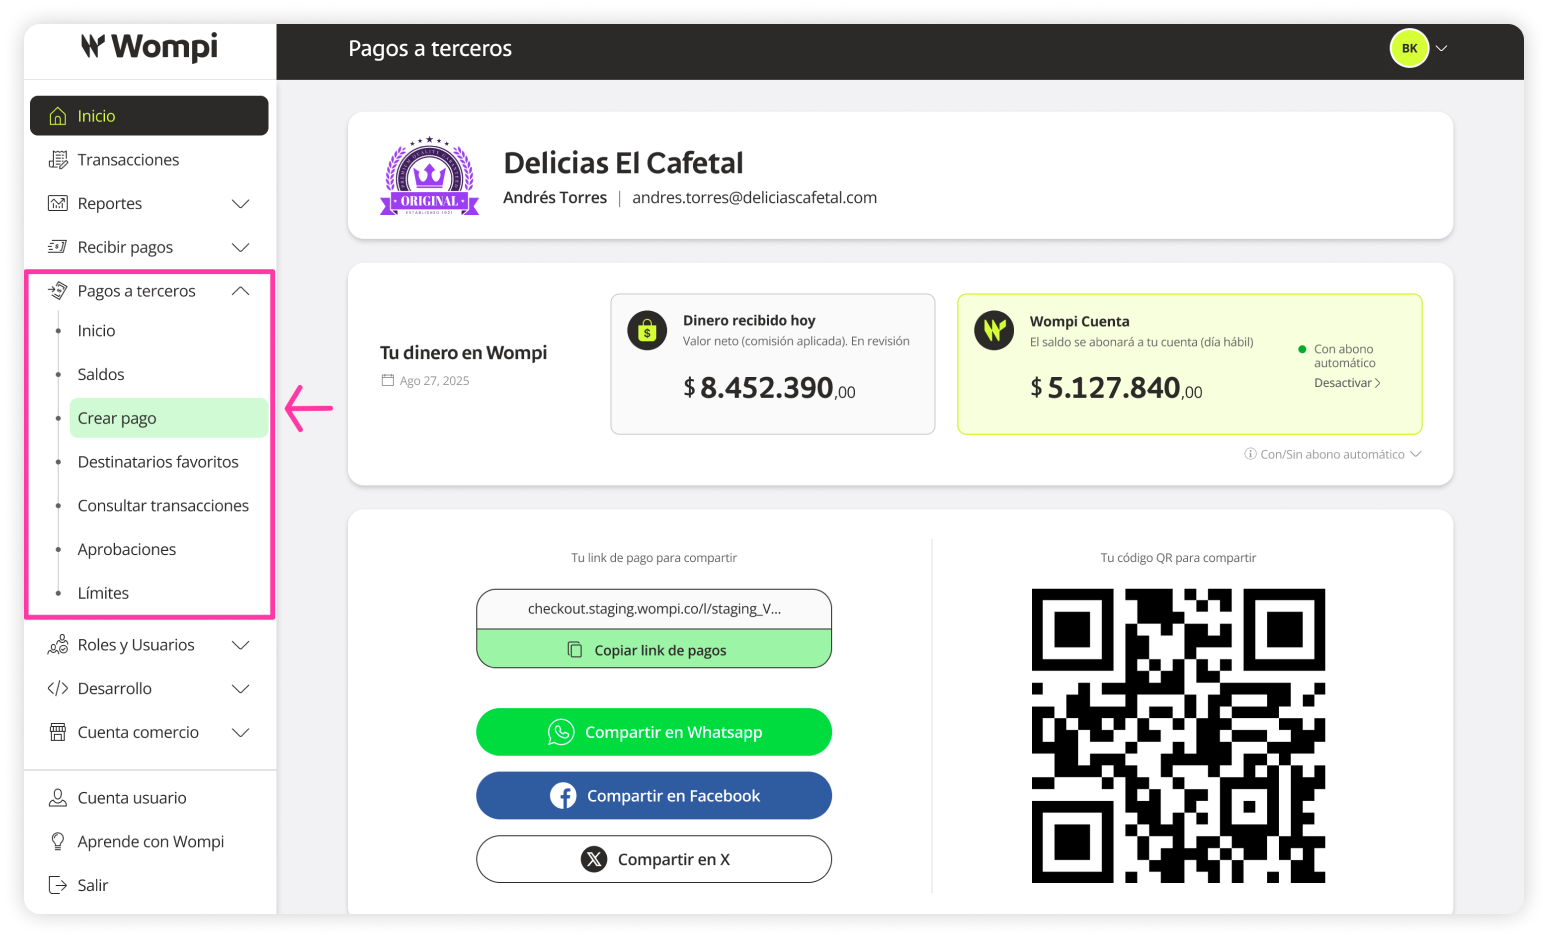
![]() Once inside the Wompi dashboard, in the left menu expand the Payouts button and select the Create payout option.
Once inside the Wompi dashboard, in the left menu expand the Payouts button and select the Create payout option.
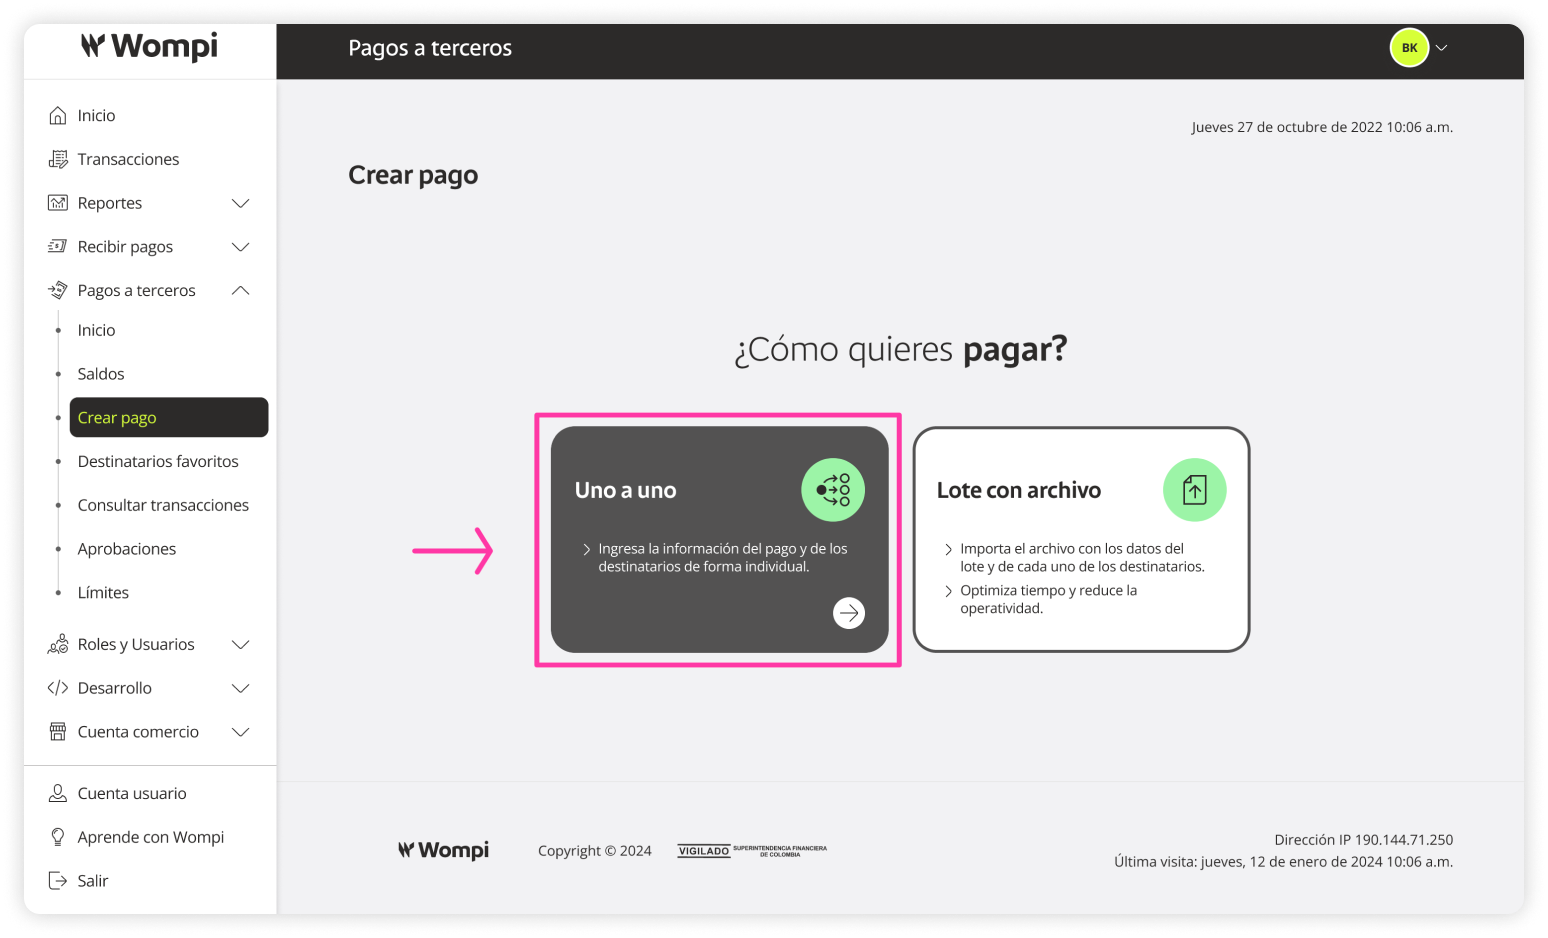
![]() In the ‘Create payout’ section, select the Manually option.
In the ‘Create payout’ section, select the Manually option.
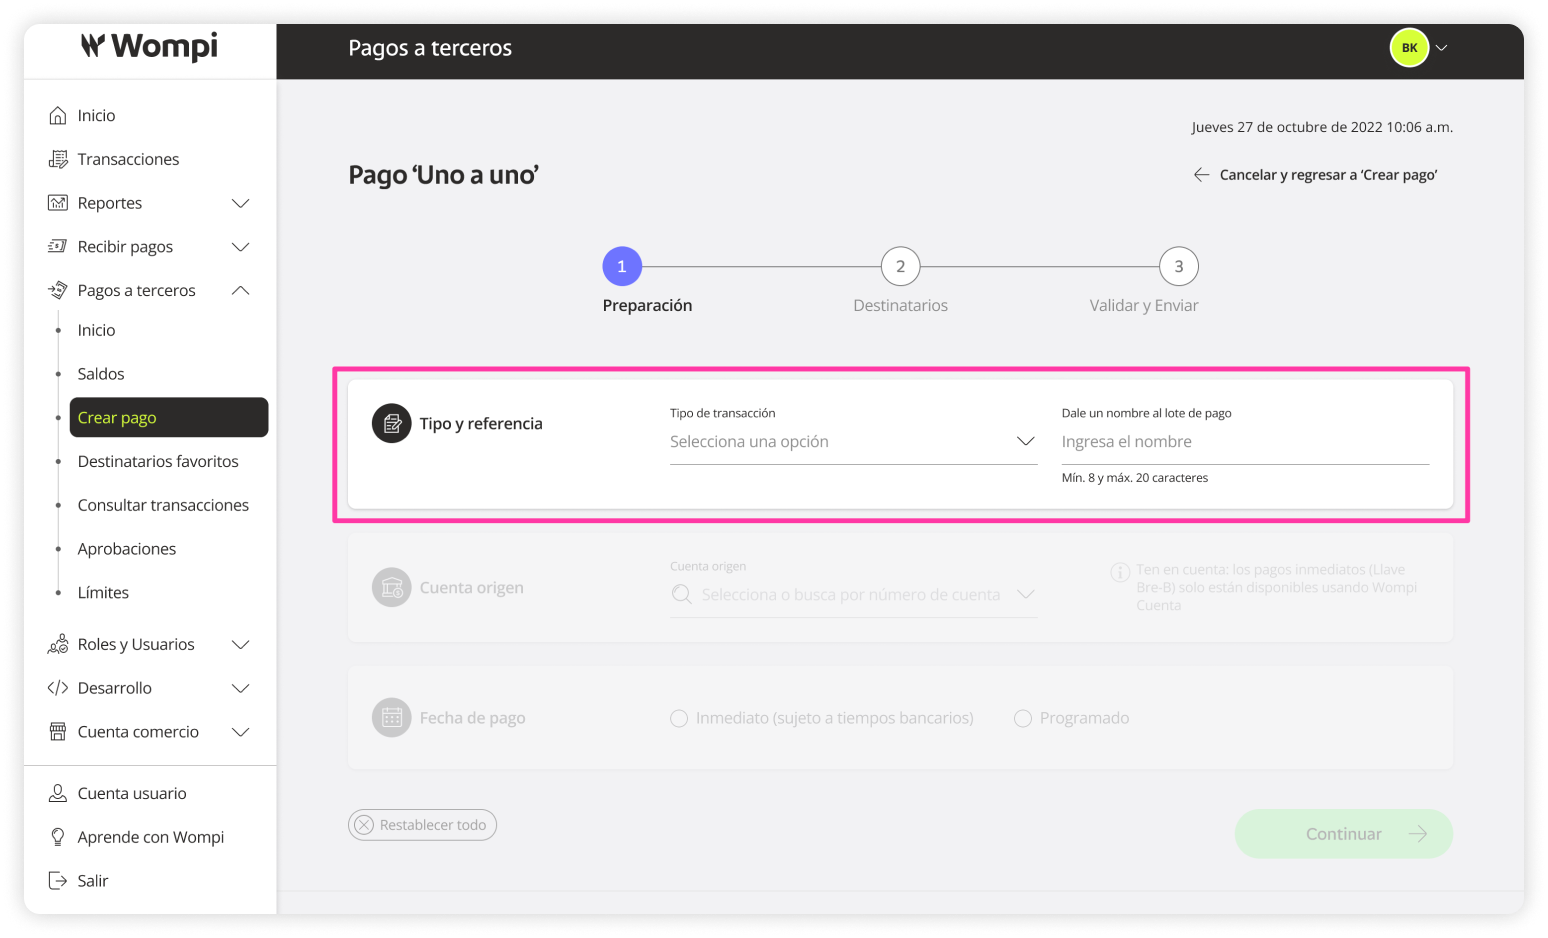
![]() The first step to create a payout is Preparation.
The first step to create a payout is Preparation.
- Type and reference: Select the type of transaction (Payroll, Suppliers, Others) and assign a name to the payout.
- Source account: Available bank accounts for payout distribution will appear here. Choose one.
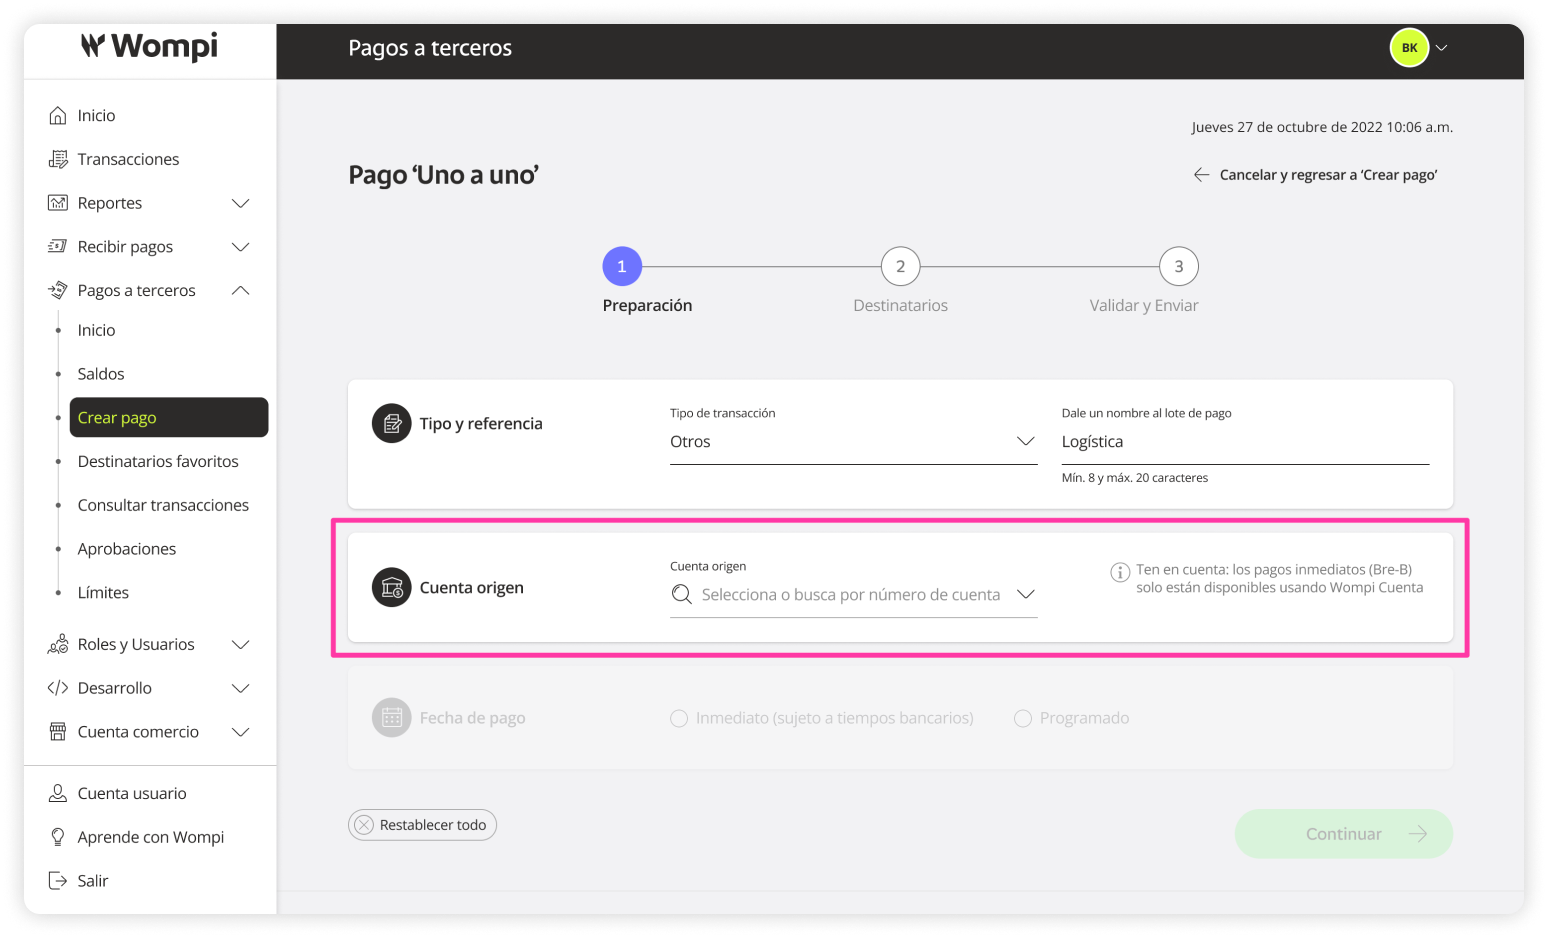
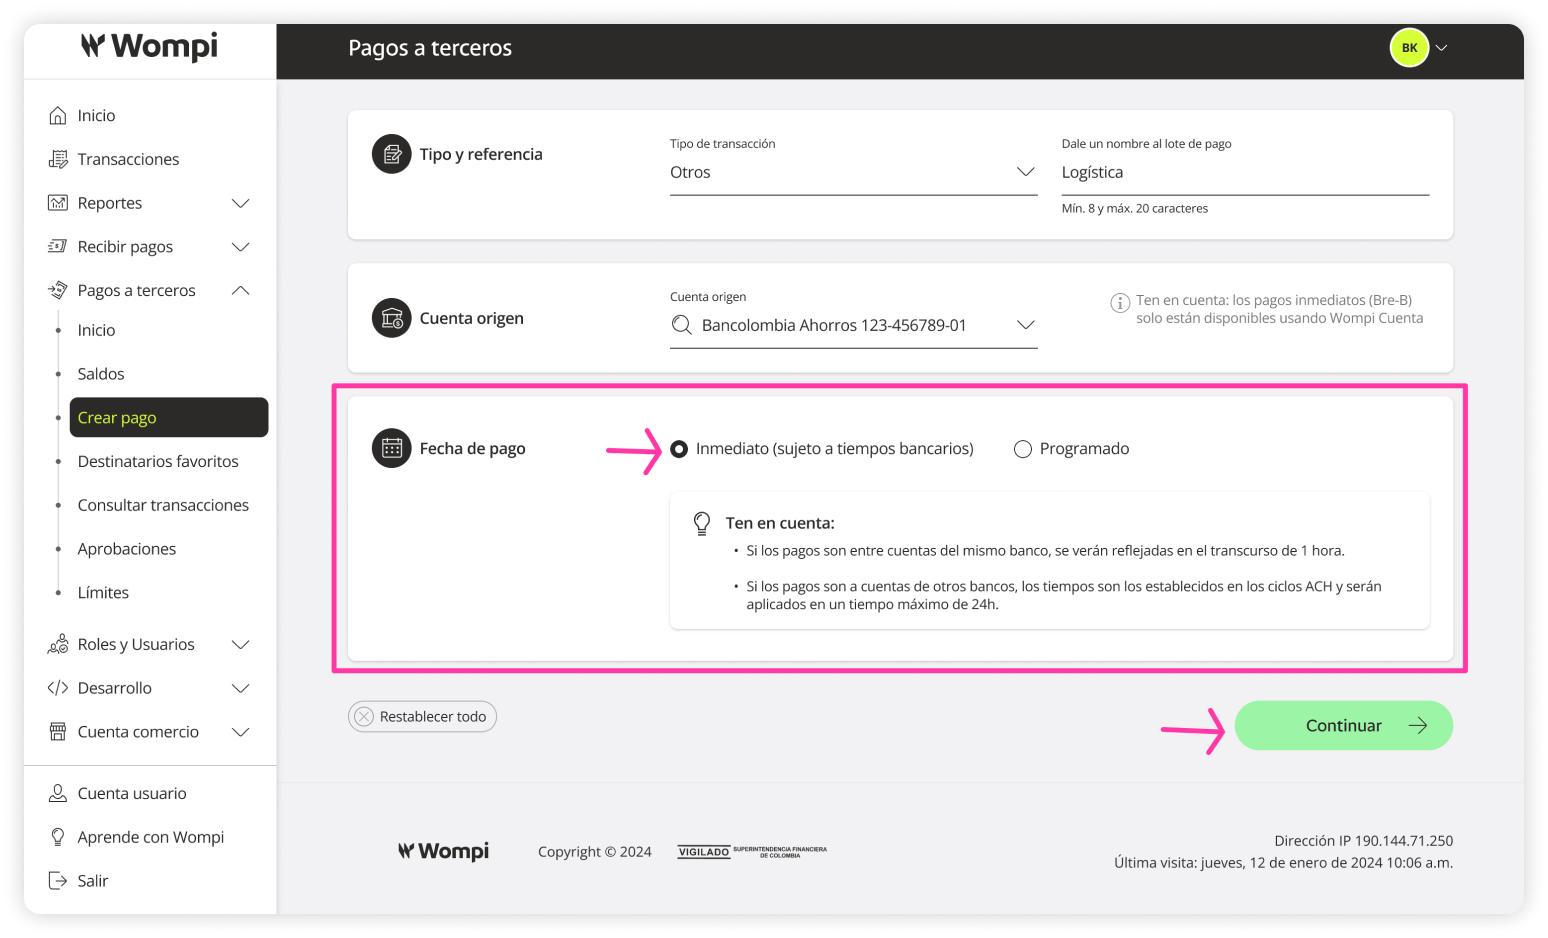
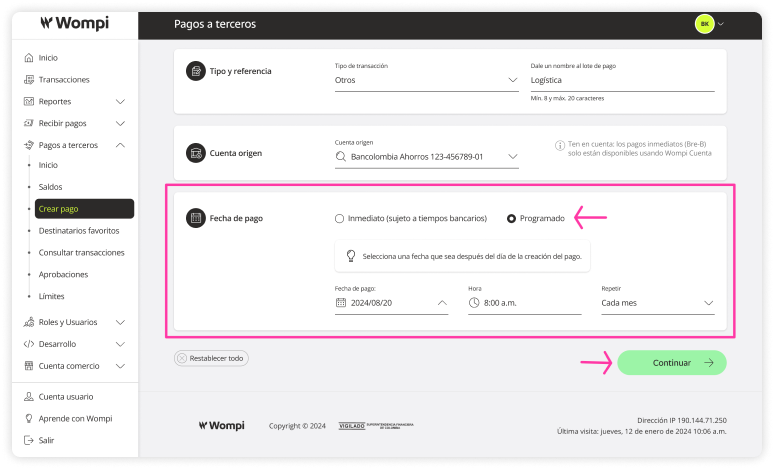
- Payout date: You can choose whether the payout will be:
Immediate: If the payout is between accounts from the same bank, it will be reflected within 1 hour. For other banks, ACH cycles apply, with a maximum processing time of 24 hours.
Scheduled: You can set the date, time, and recurrence of the payout.
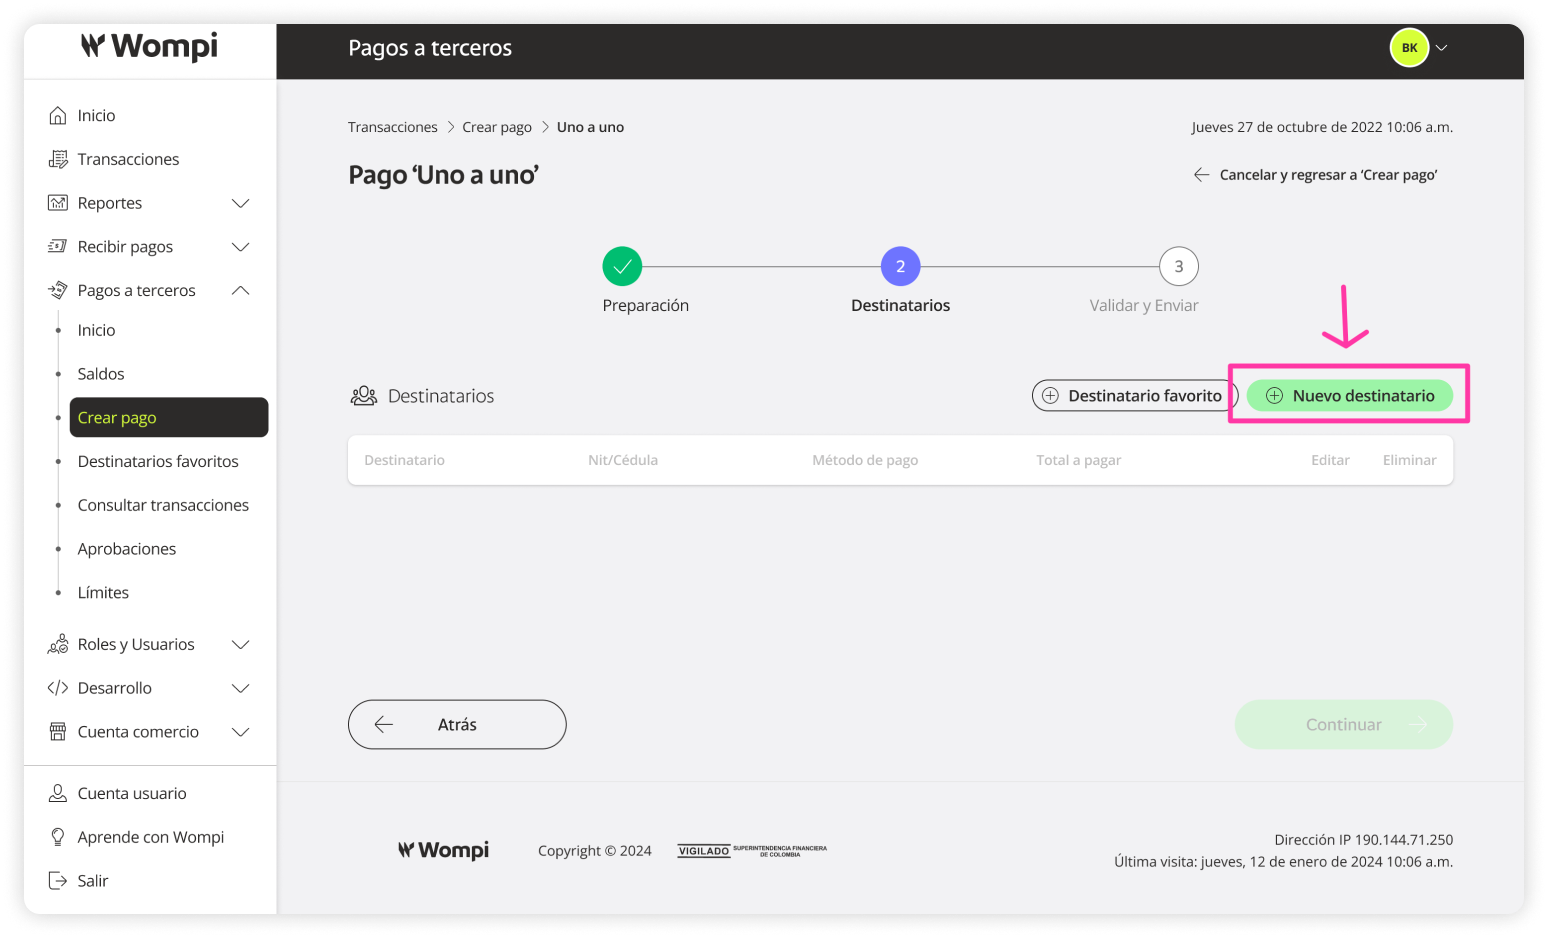
![]() The second step is Recipients.
The second step is Recipients.
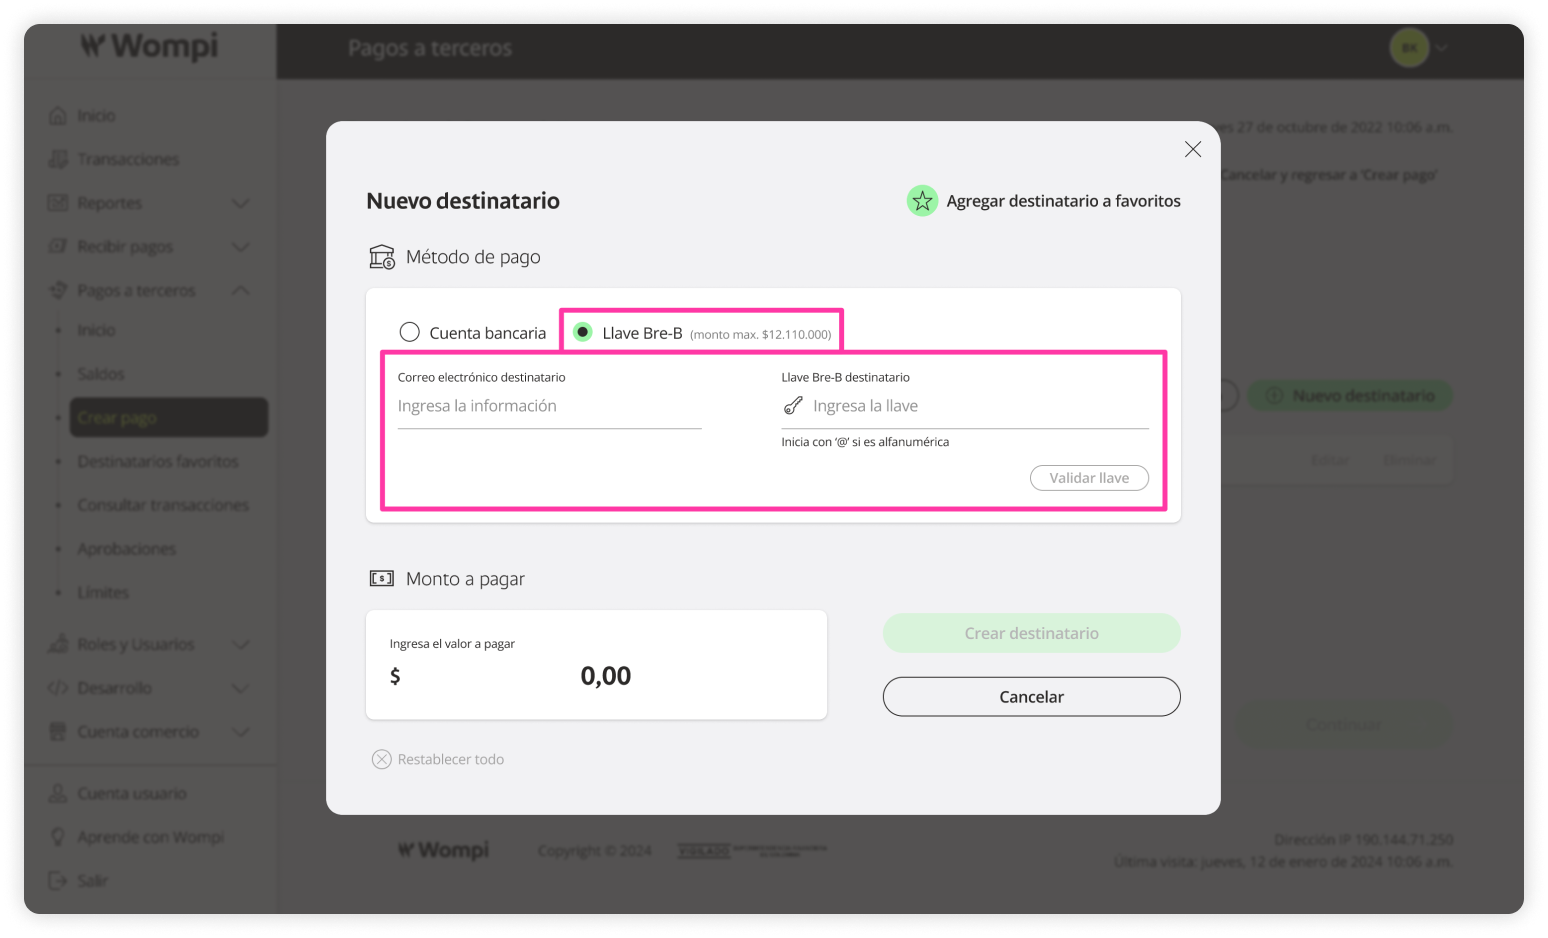
Click the Add recipient button.
Enter the Recipient information (Full name, email, person type, ID type and number), Destination account (Bank, account type, account number), and Amount to pay.
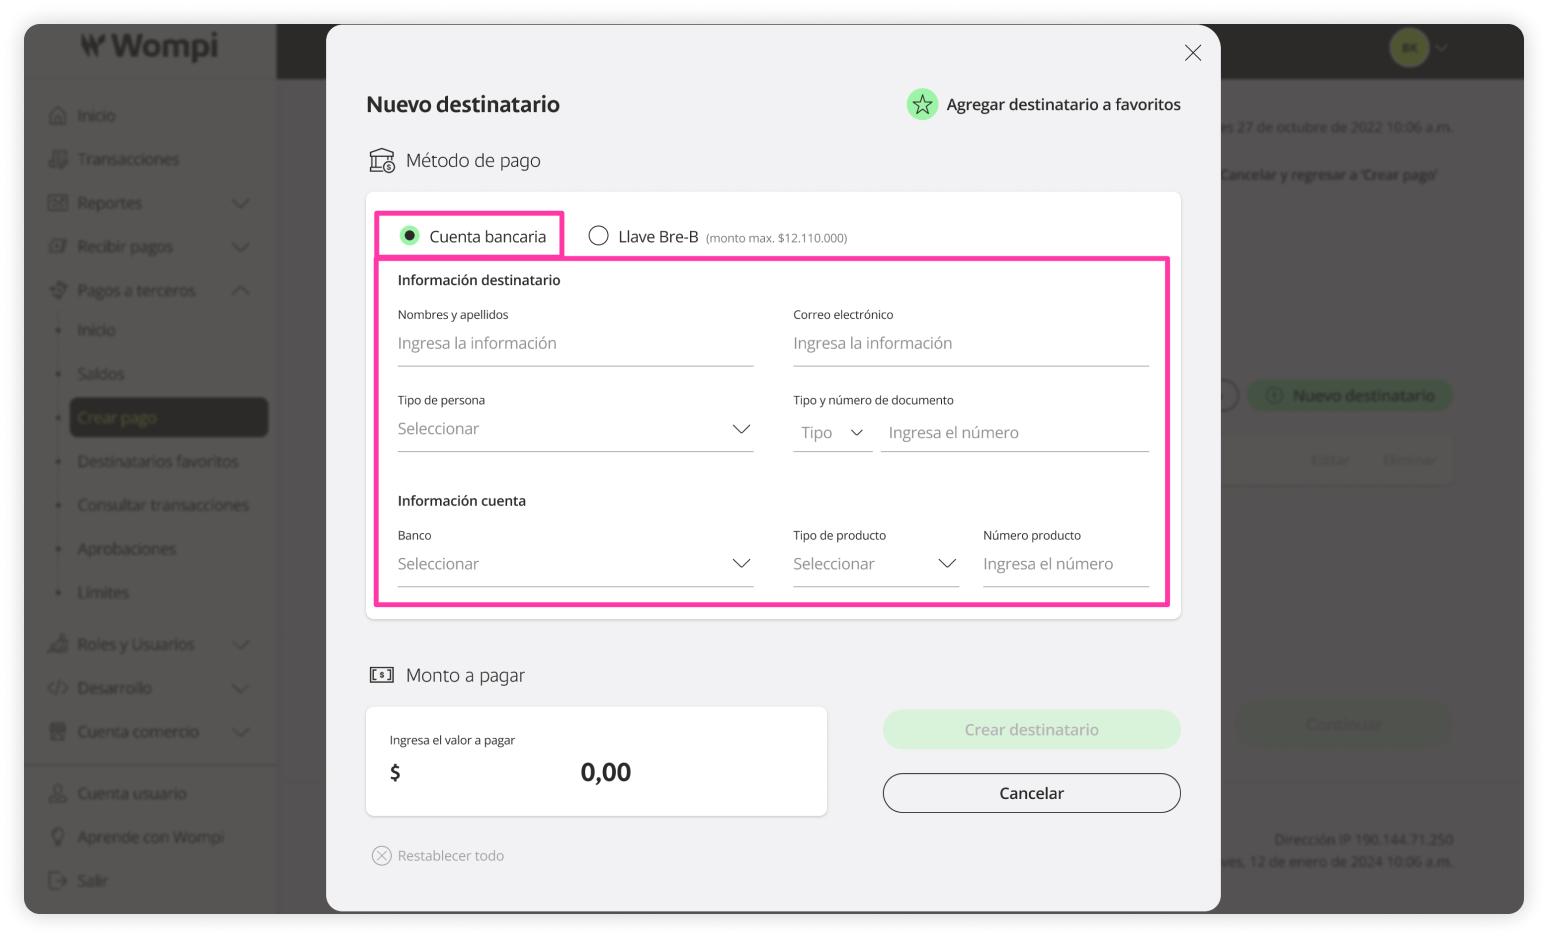
You will see the created recipient in the table. Keep in mind that you can keep adding as many recipients as needed.
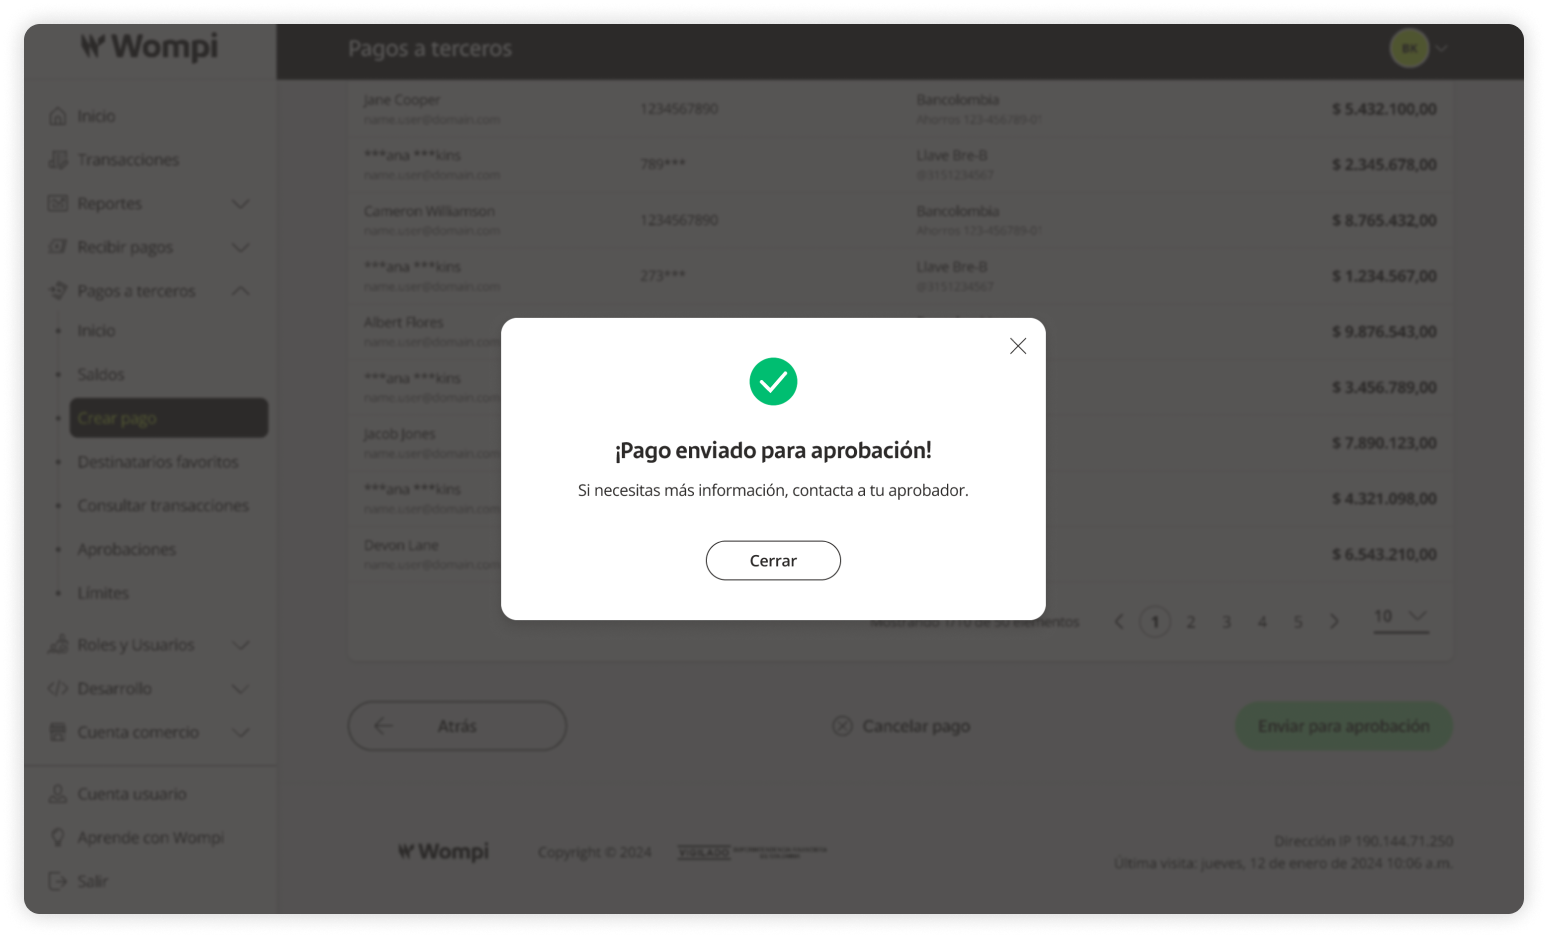
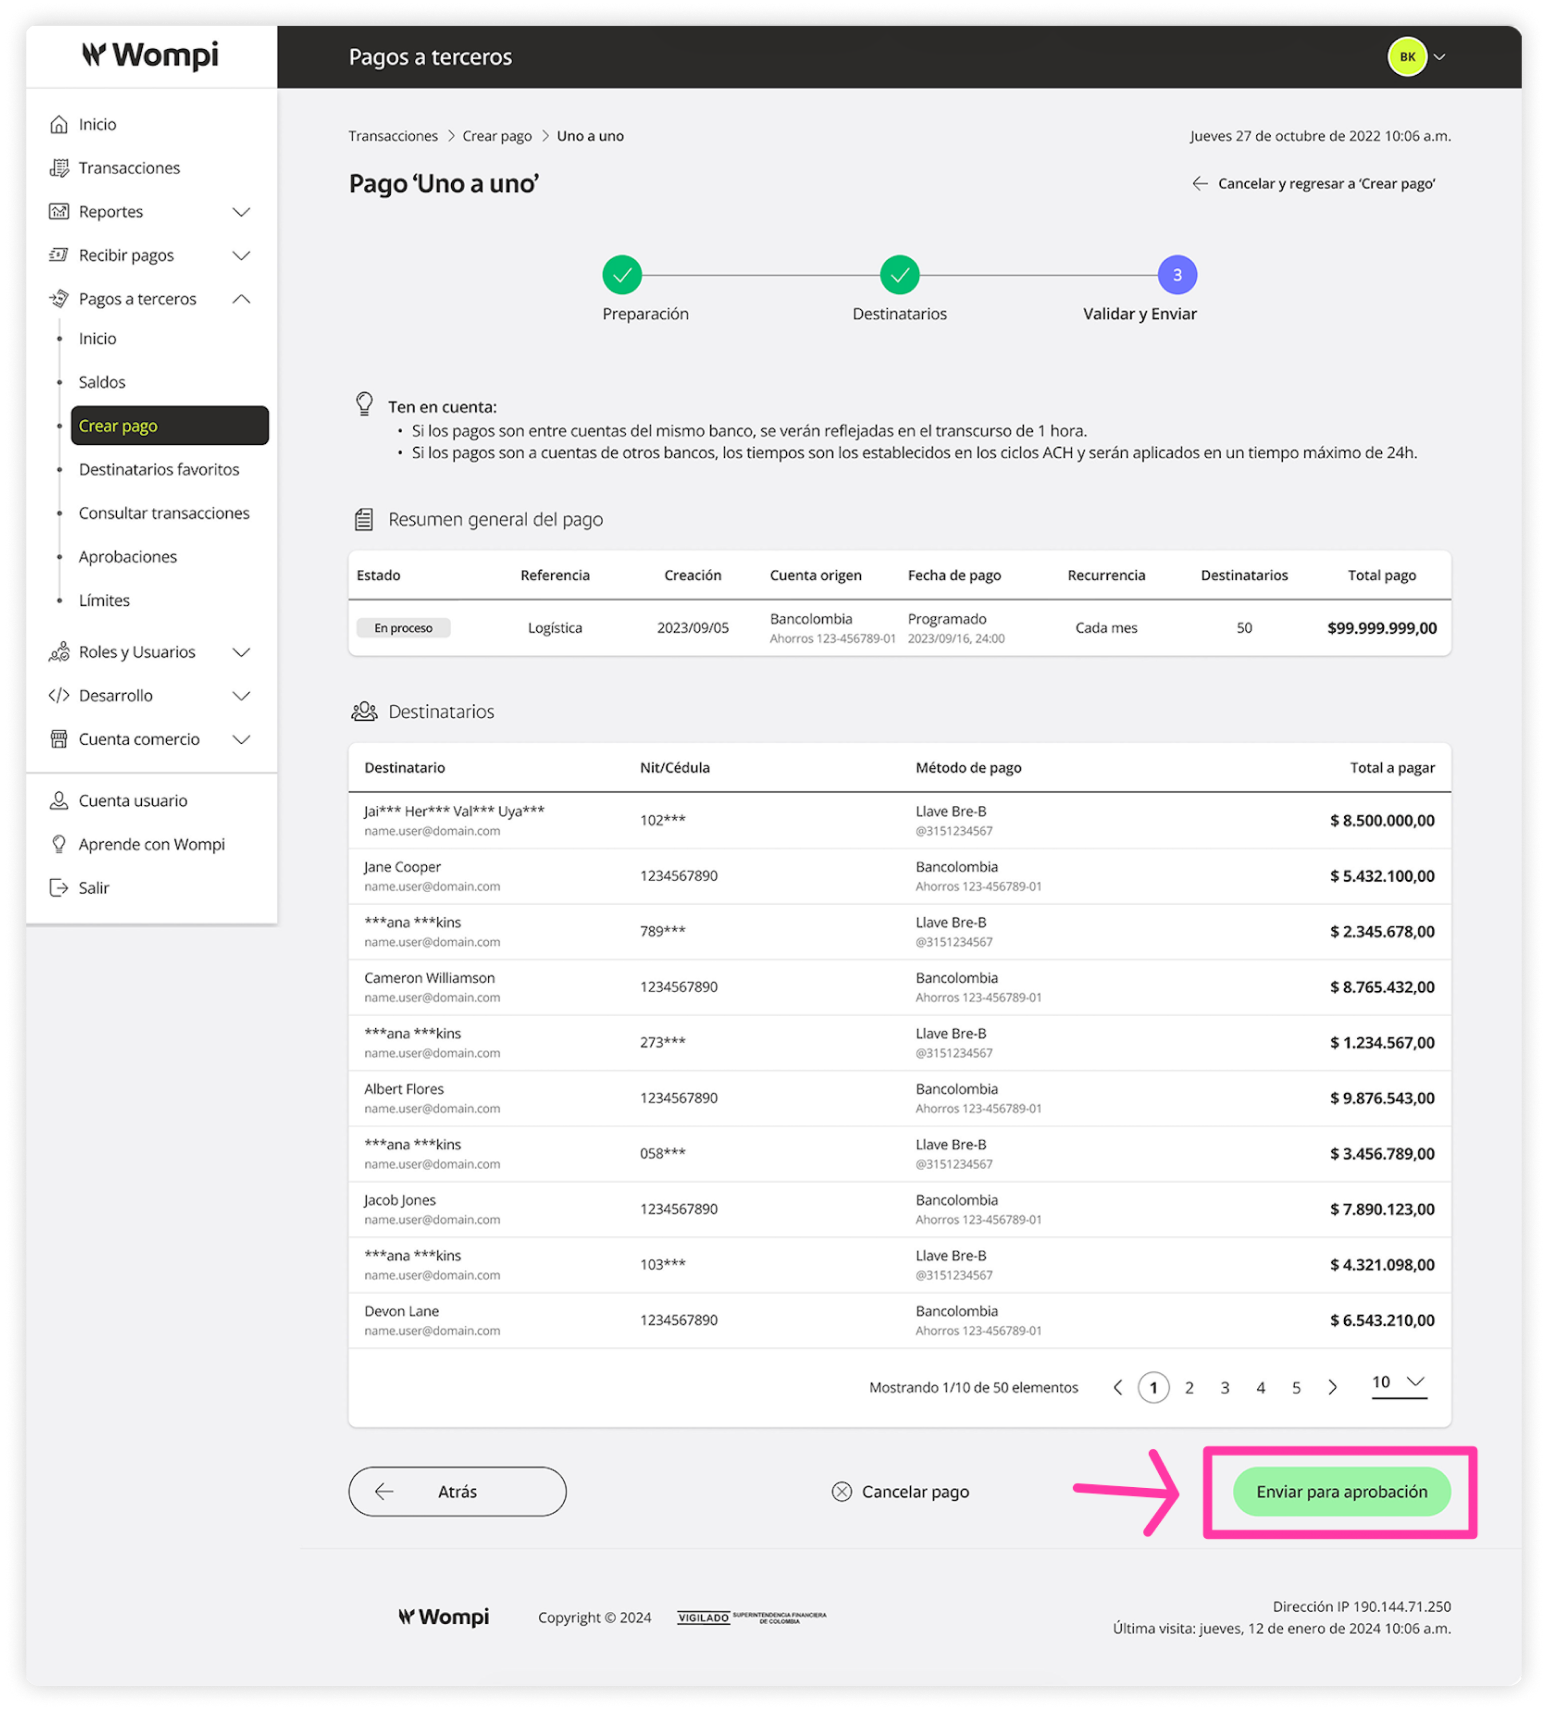
![]() The final step is Review and send.
The final step is Review and send.
You’ll see the full summary of the created payout. If needed, you can go back using the Back button to make any adjustments.
![]() A confirmation message will appear.
A confirmation message will appear.