Roles
In this section, you can create and manage roles by assigning specific permissions and actions to each user.
Required Permissions
- You must have a SuperAdmin role or a role with permissions to view and manage roles.
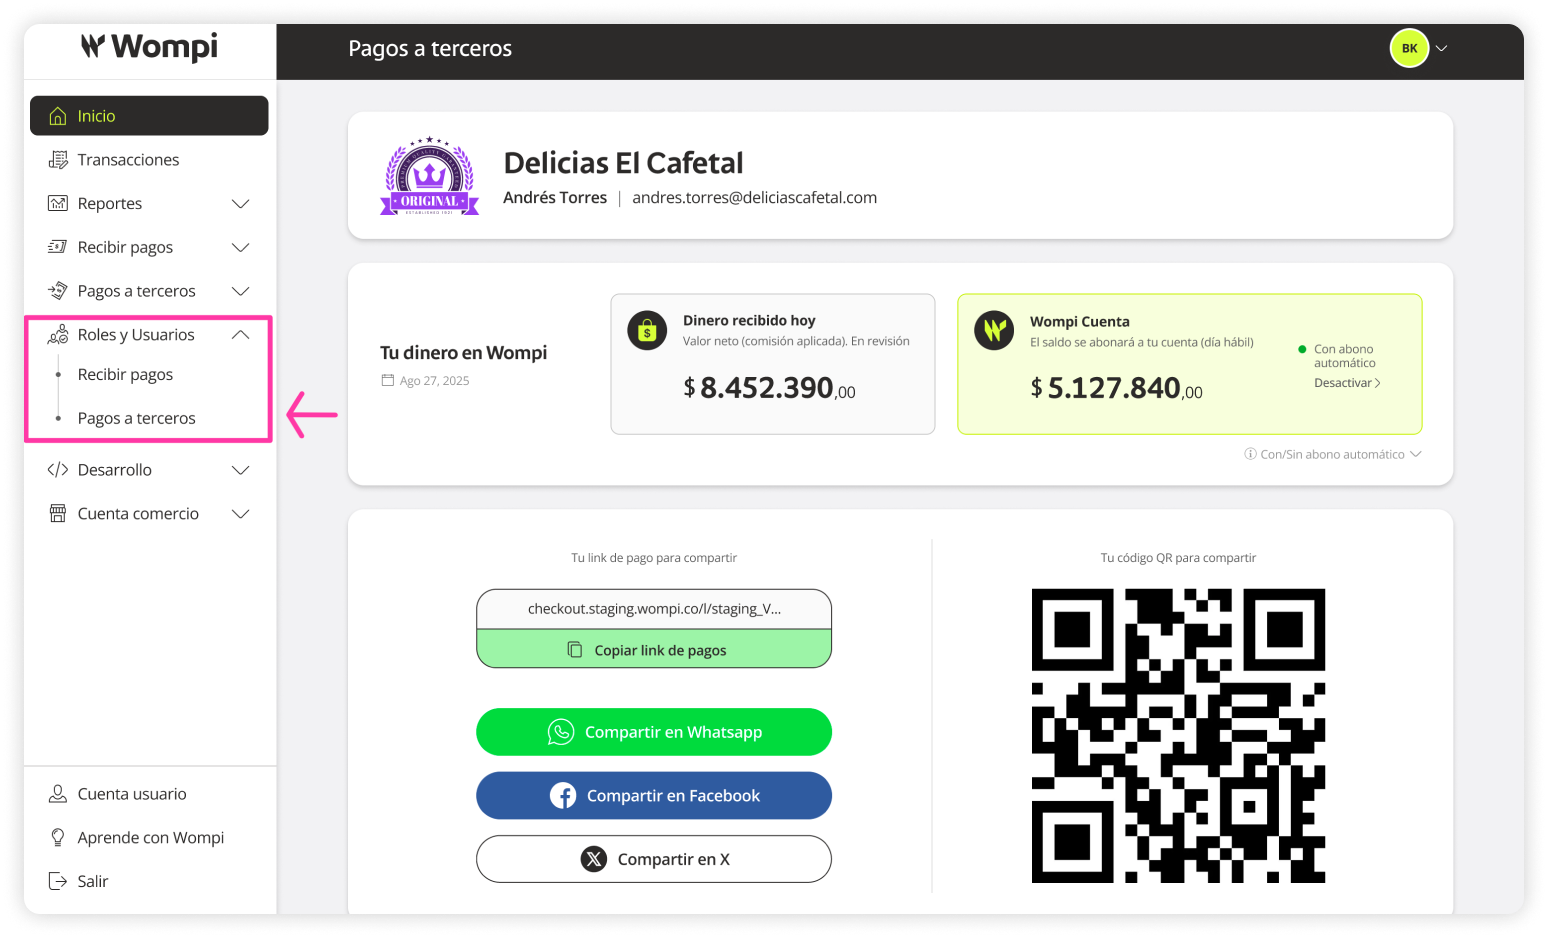
![]() Once inside the Wompi dashboard, expand the Roles and Users menu from the left sidebar and select Third-party payments.
Once inside the Wompi dashboard, expand the Roles and Users menu from the left sidebar and select Third-party payments.
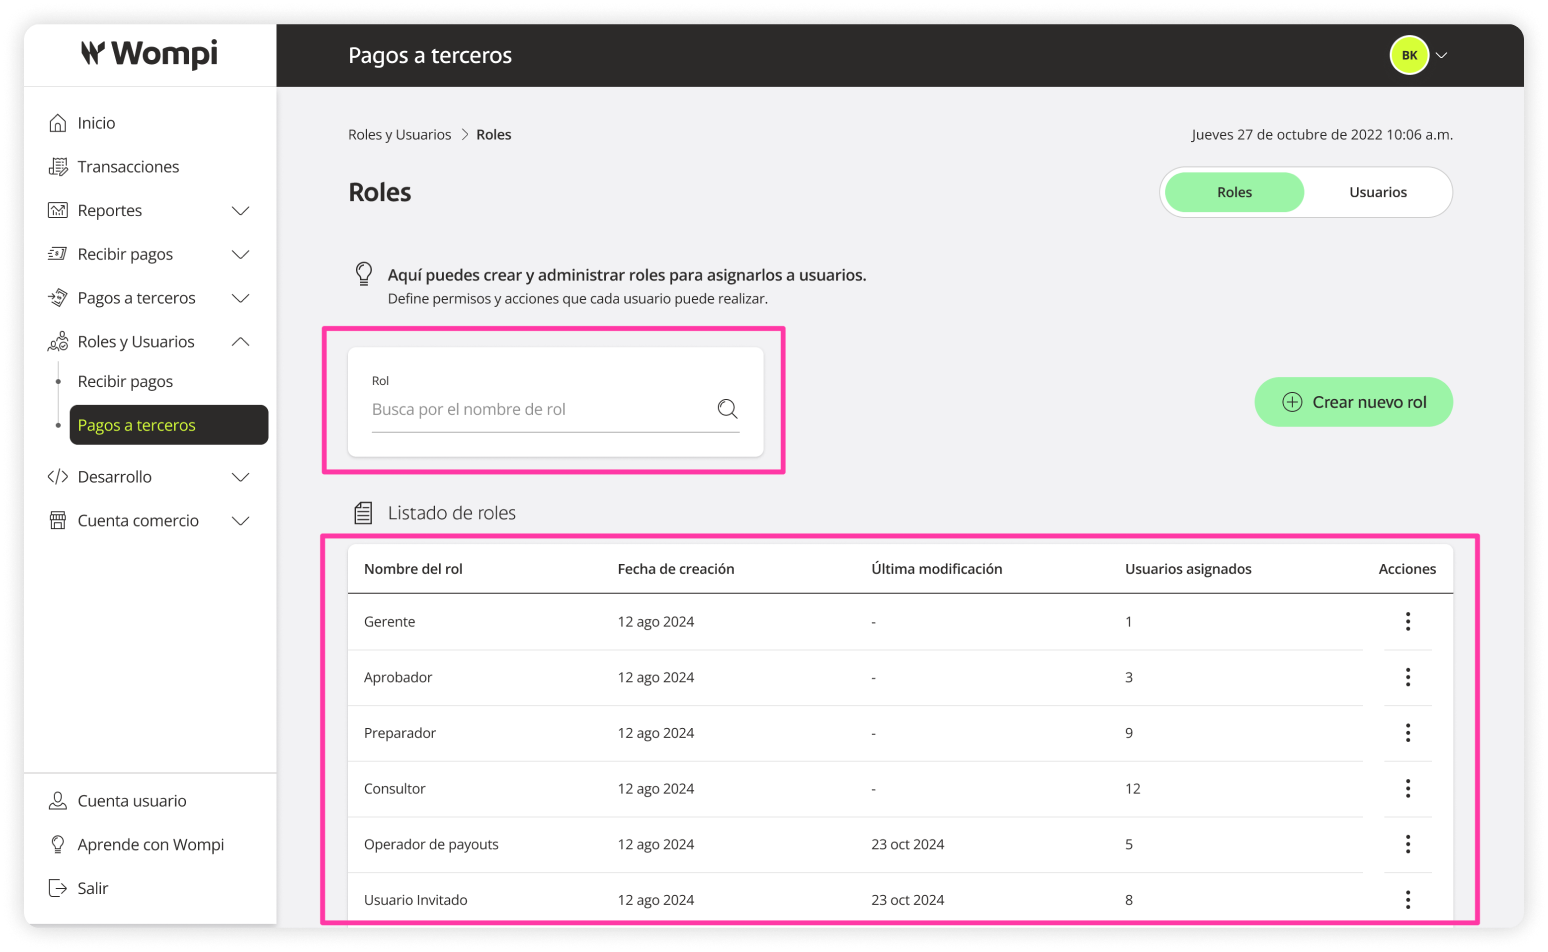
![]() In the Roles (Third-party payments) section, you can view and edit the following information:
In the Roles (Third-party payments) section, you can view and edit the following information:
Create a new role
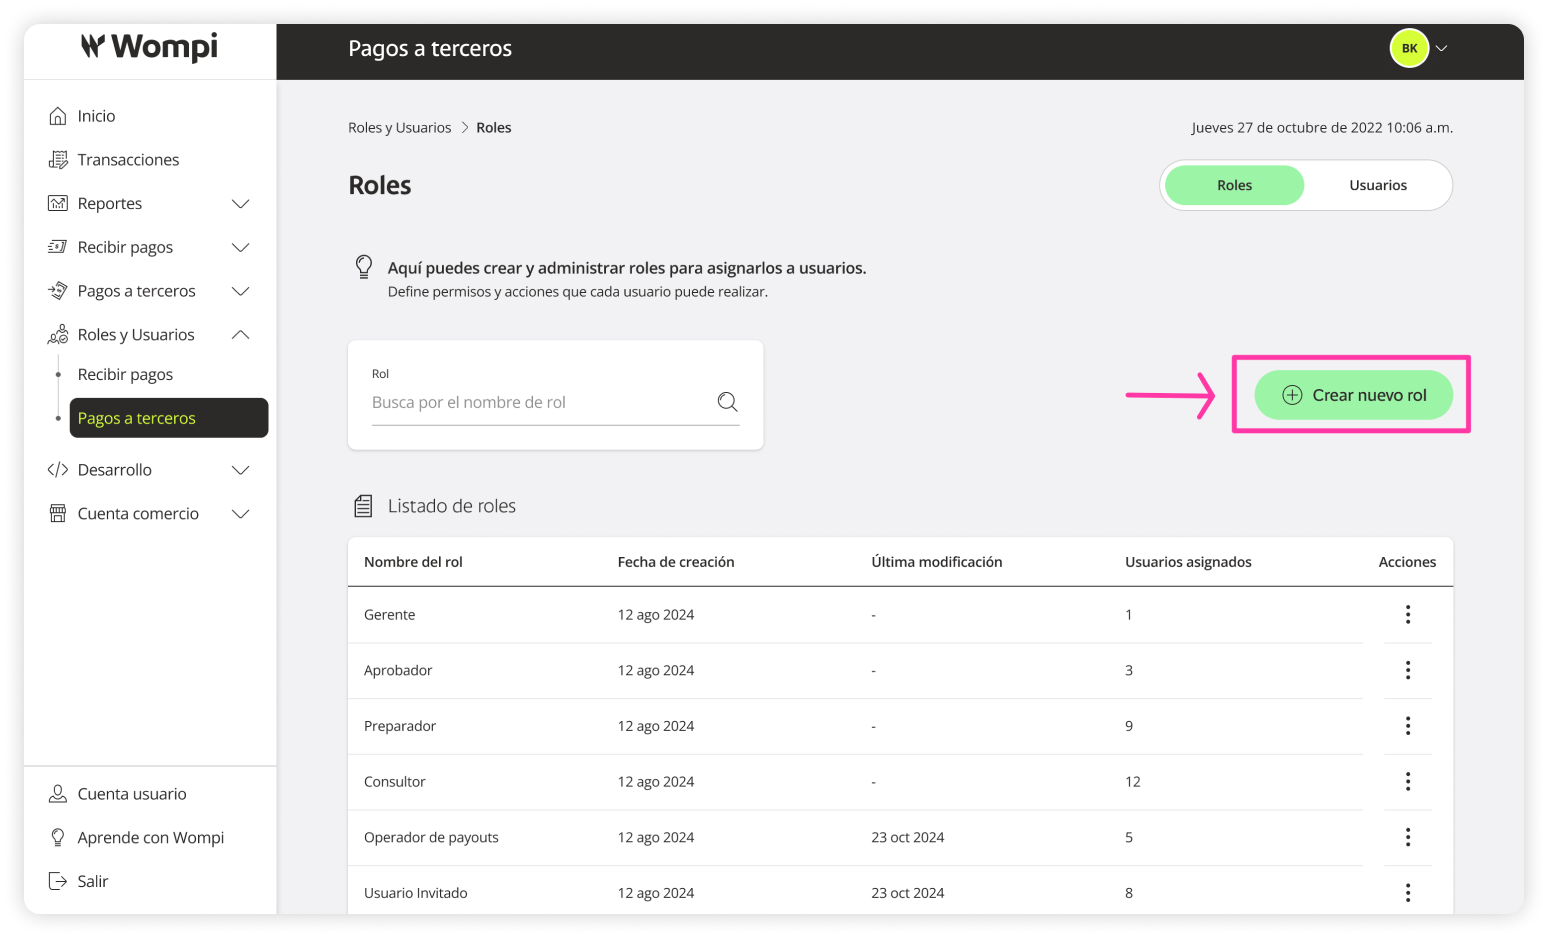
![]() In the Roles section of Third-party payments, click the Create new role button.
In the Roles section of Third-party payments, click the Create new role button.
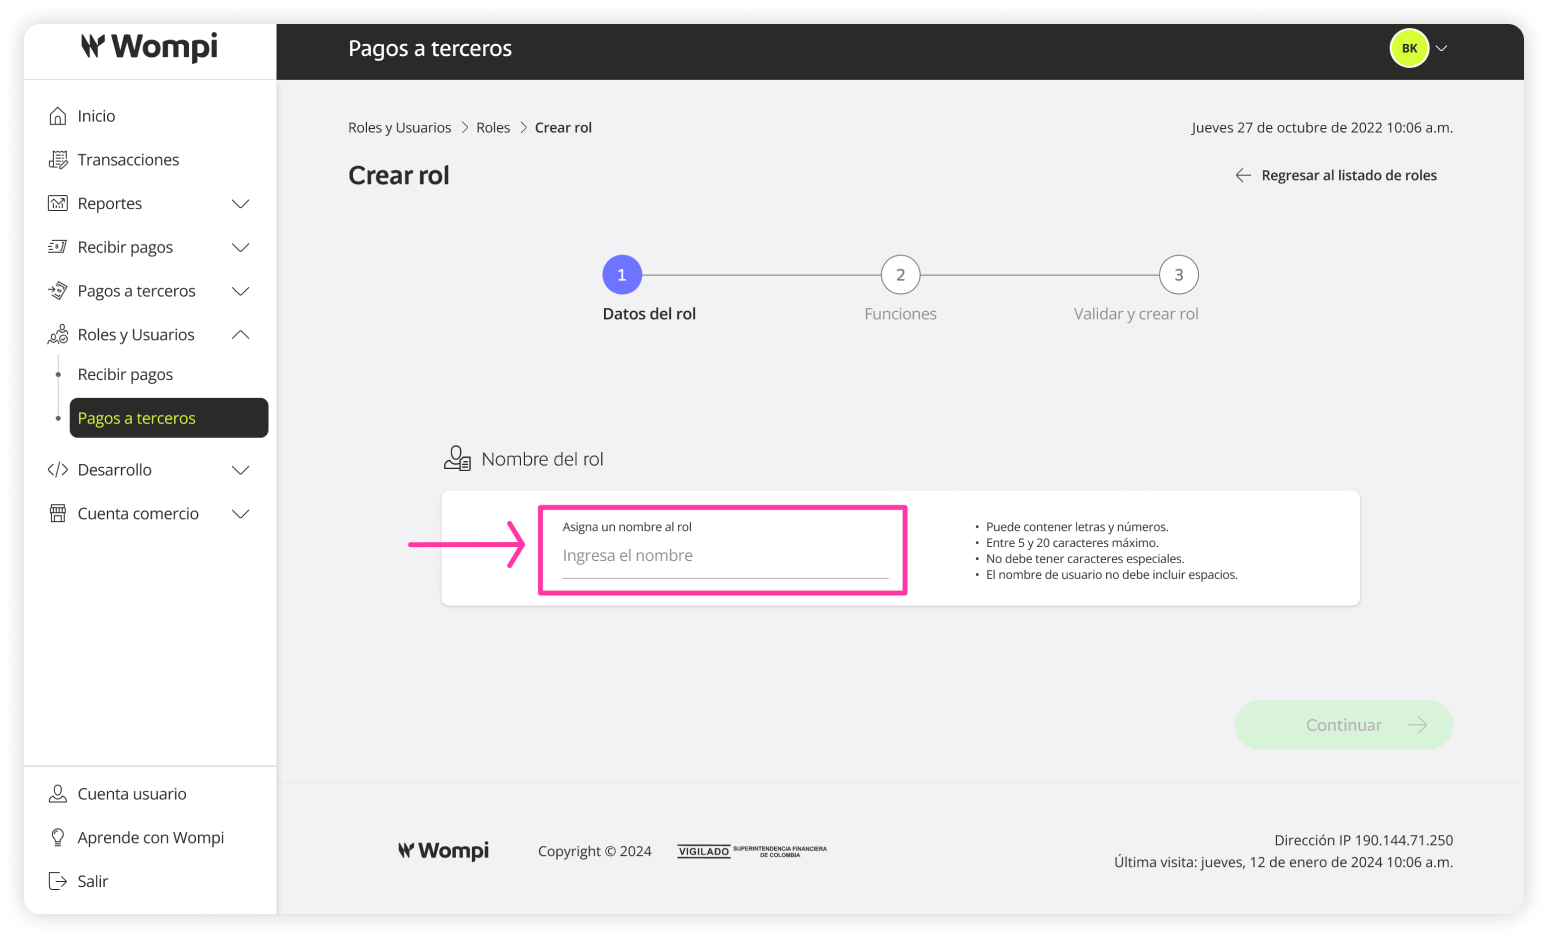
![]() The first step is to assign a name to the role.
The first step is to assign a name to the role.
Keep in mind:
- It can contain letters and numbers.
- Must be between 5 and 20 characters.
- Special characters are not allowed.
- The name should not contain spaces.
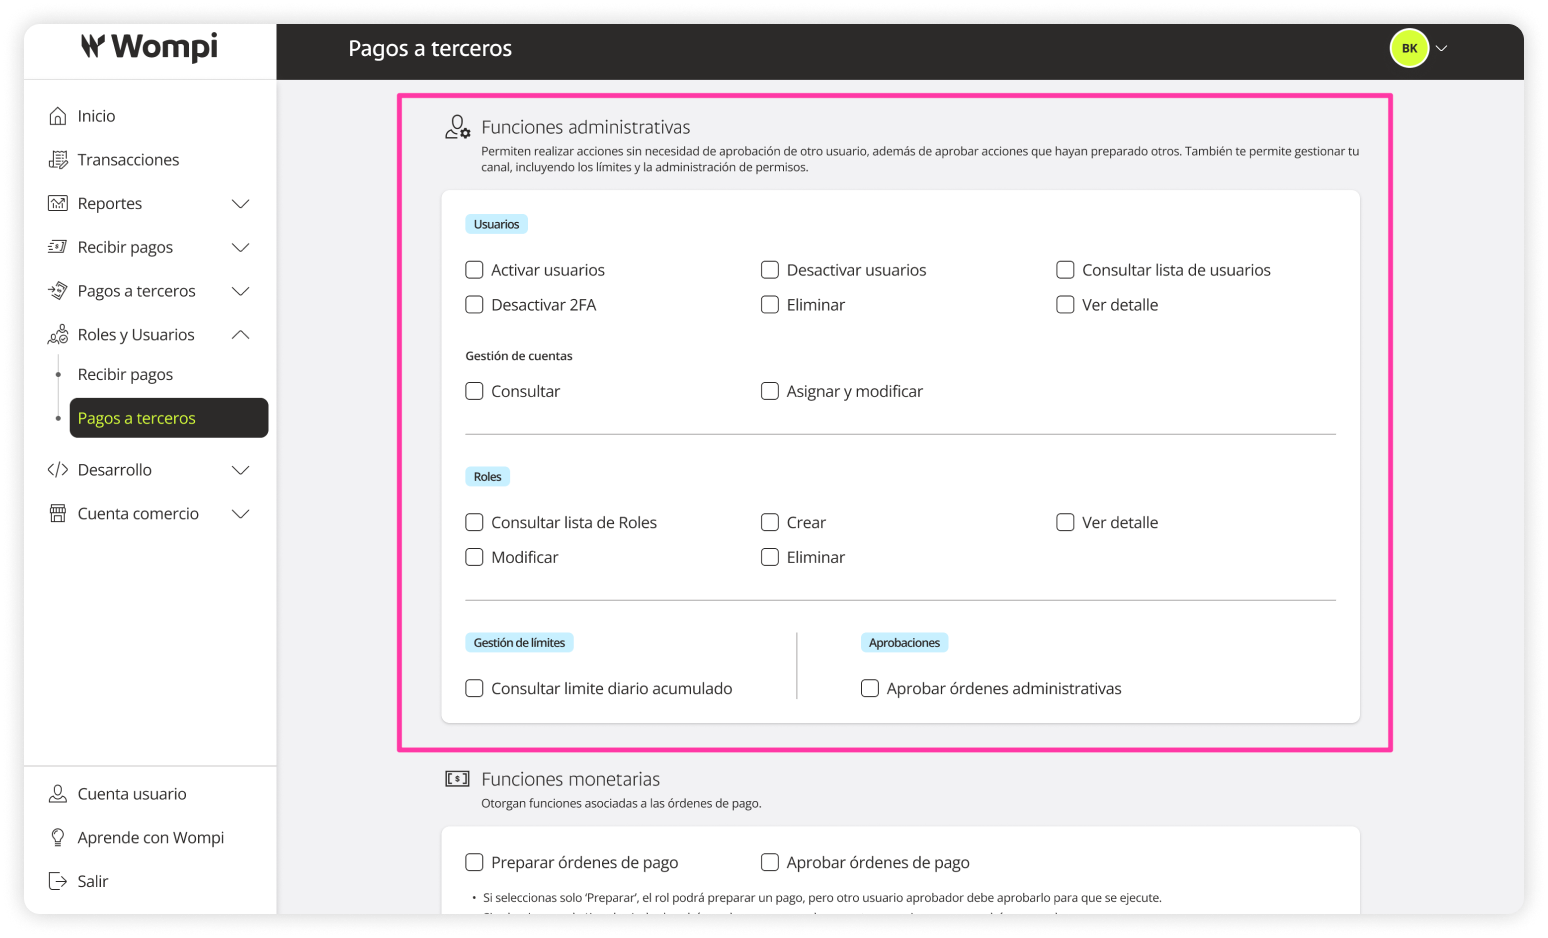
![]() In the second step, define the actions and permissions for this role.
In the second step, define the actions and permissions for this role.
Administrative Functions
Allow users to perform actions without needing another user's approval, approve actions prepared by others, and manage your channel, including limits and permission management.
> Users: Activate, deactivate, view user list, disable 2FA, delete, view details, manage accounts (view, assign, and edit).
> Roles: View list, create, view details, edit, delete.
> Limit Management: View daily accumulated limit.
> Approvals: Approve administrative orders.
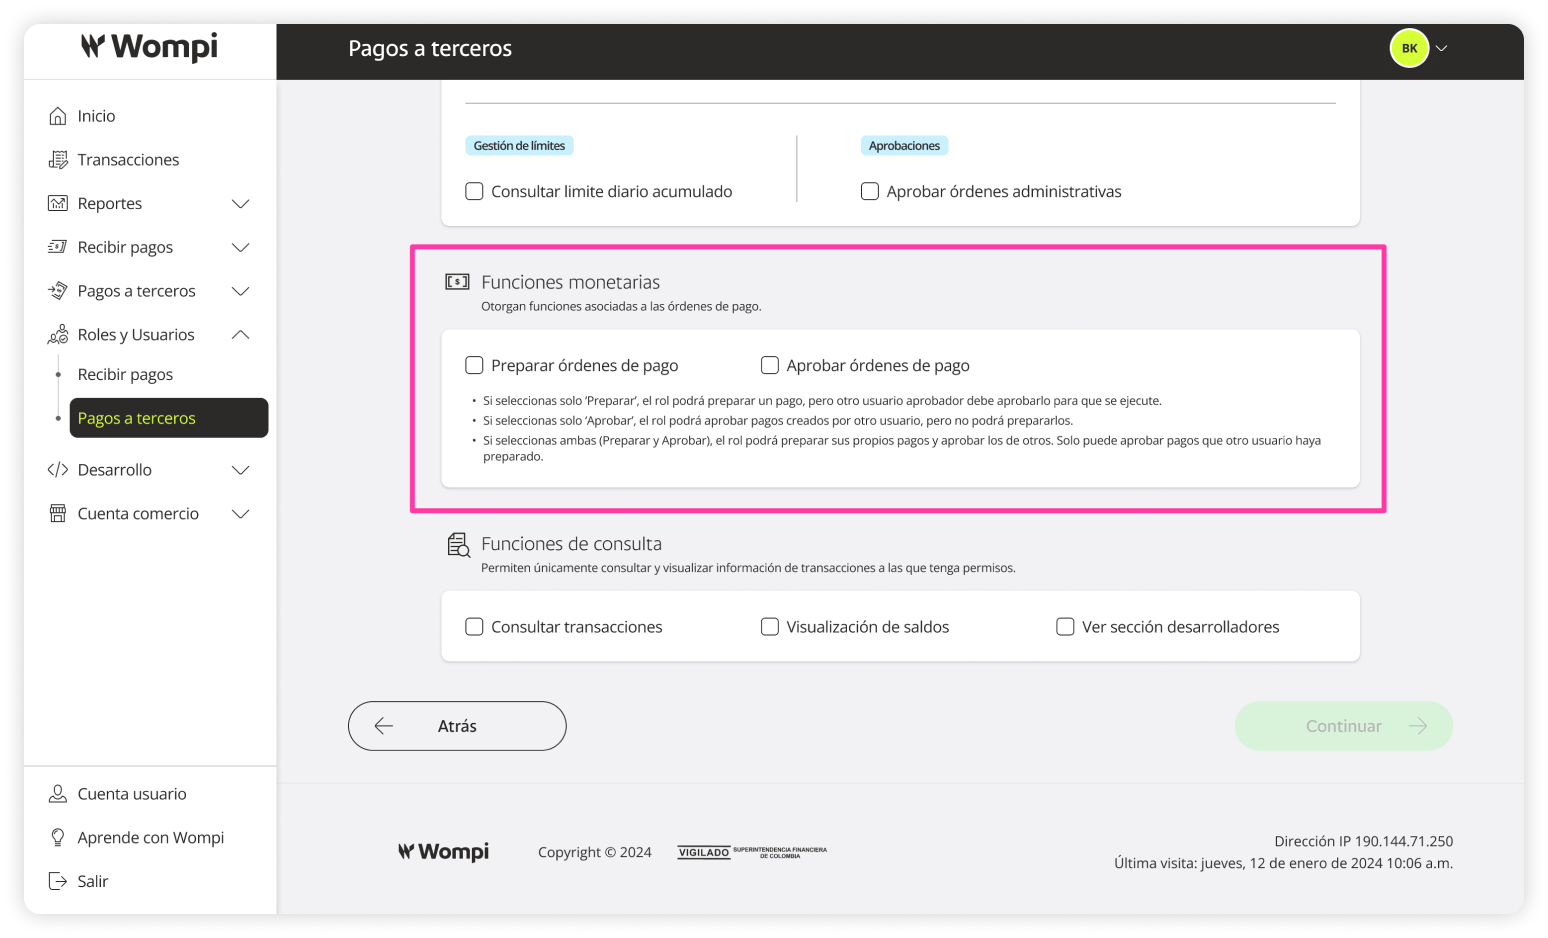
Monetary Functions
Enable actions related to payment orders.
> Prepare payment orders, Approve payment orders.
- If you select only ‘Prepare,’ the role can prepare payments, but another user must approve them for execution.
- If you select only ‘Approve,’ the role can approve payments created by others but not prepare them.
- If you select both (Prepare and Approve), the role can prepare its own payments and approve others'. It can only approve payments prepared by another user.
Read-only Functions
Allow the user to view information only for the transactions they have access to.
> View transactions, View balances, Access Developer section.
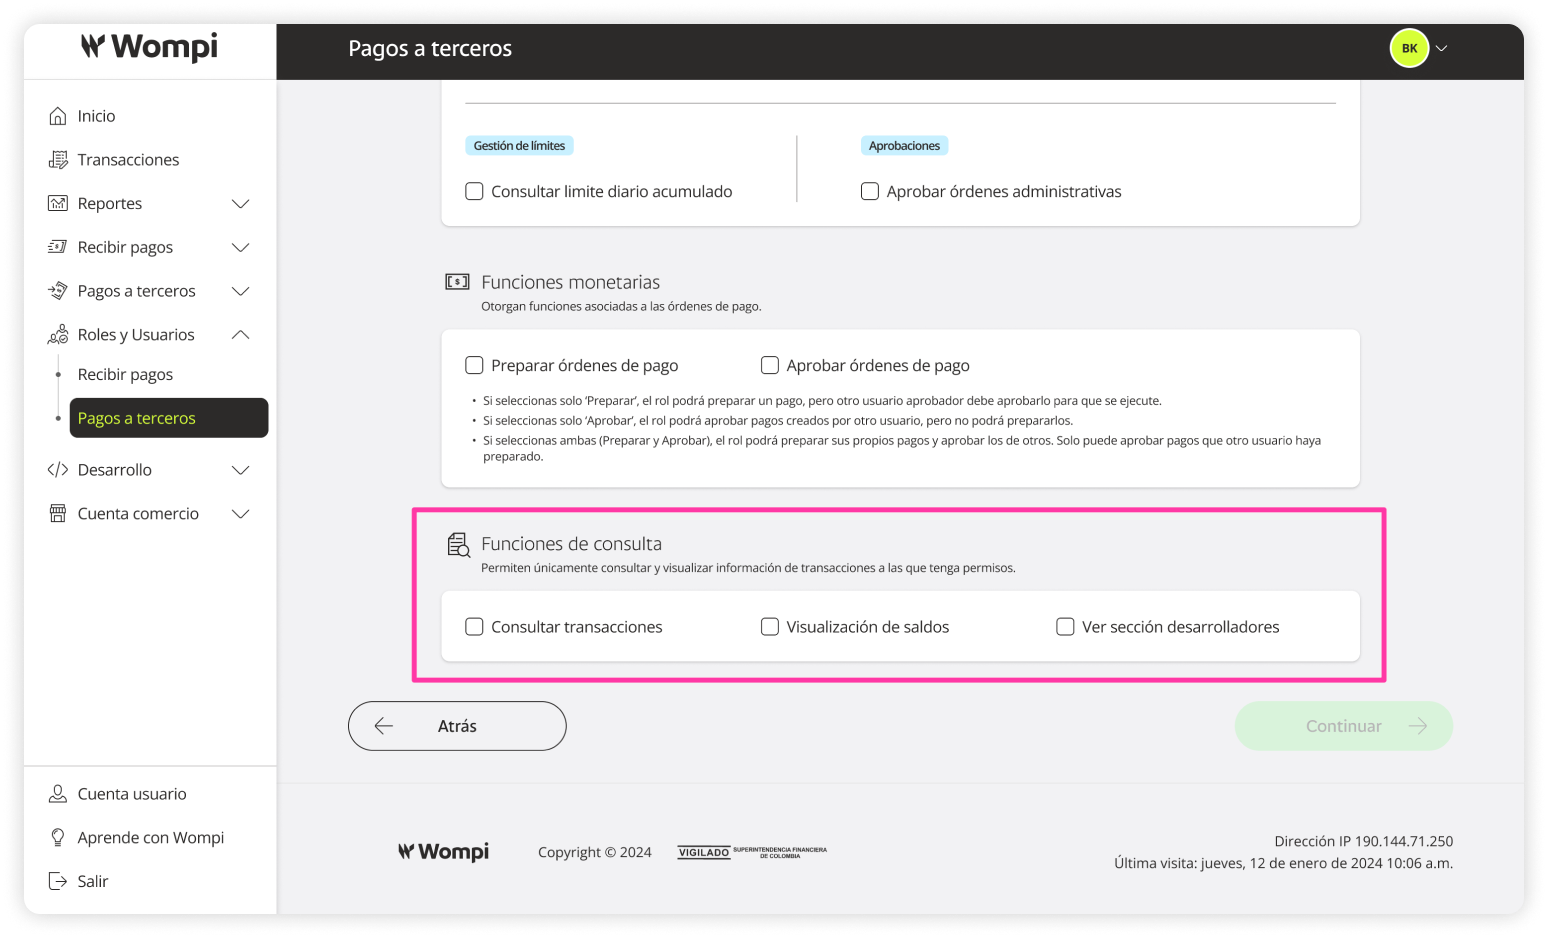
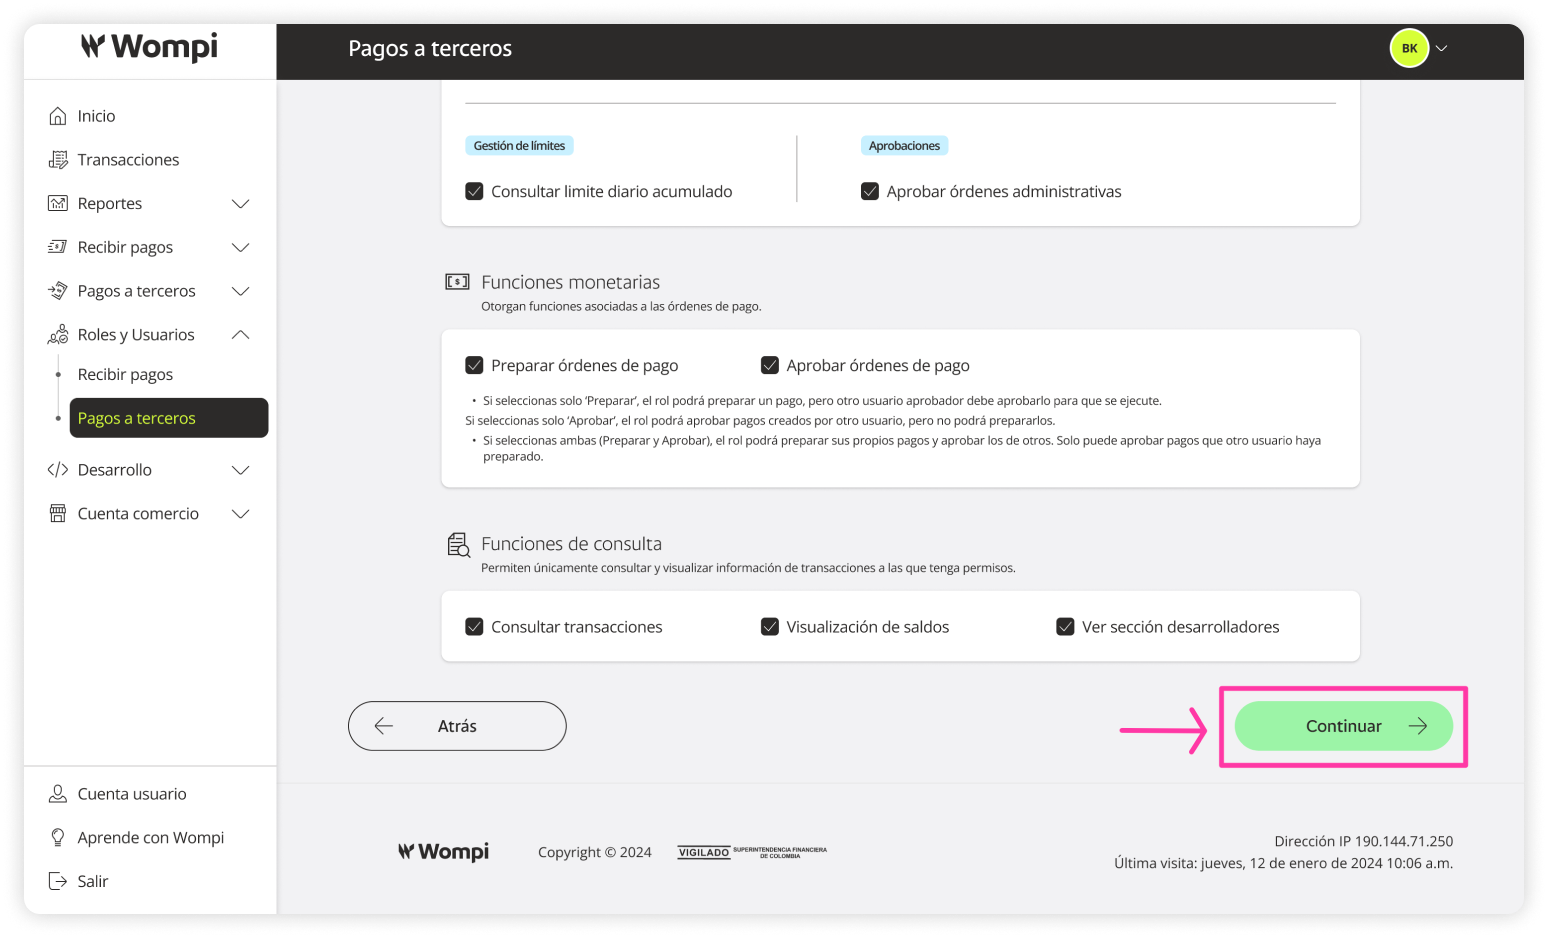
![]() Once you've selected the permissions and actions for the role, click Continue.
Once you've selected the permissions and actions for the role, click Continue.
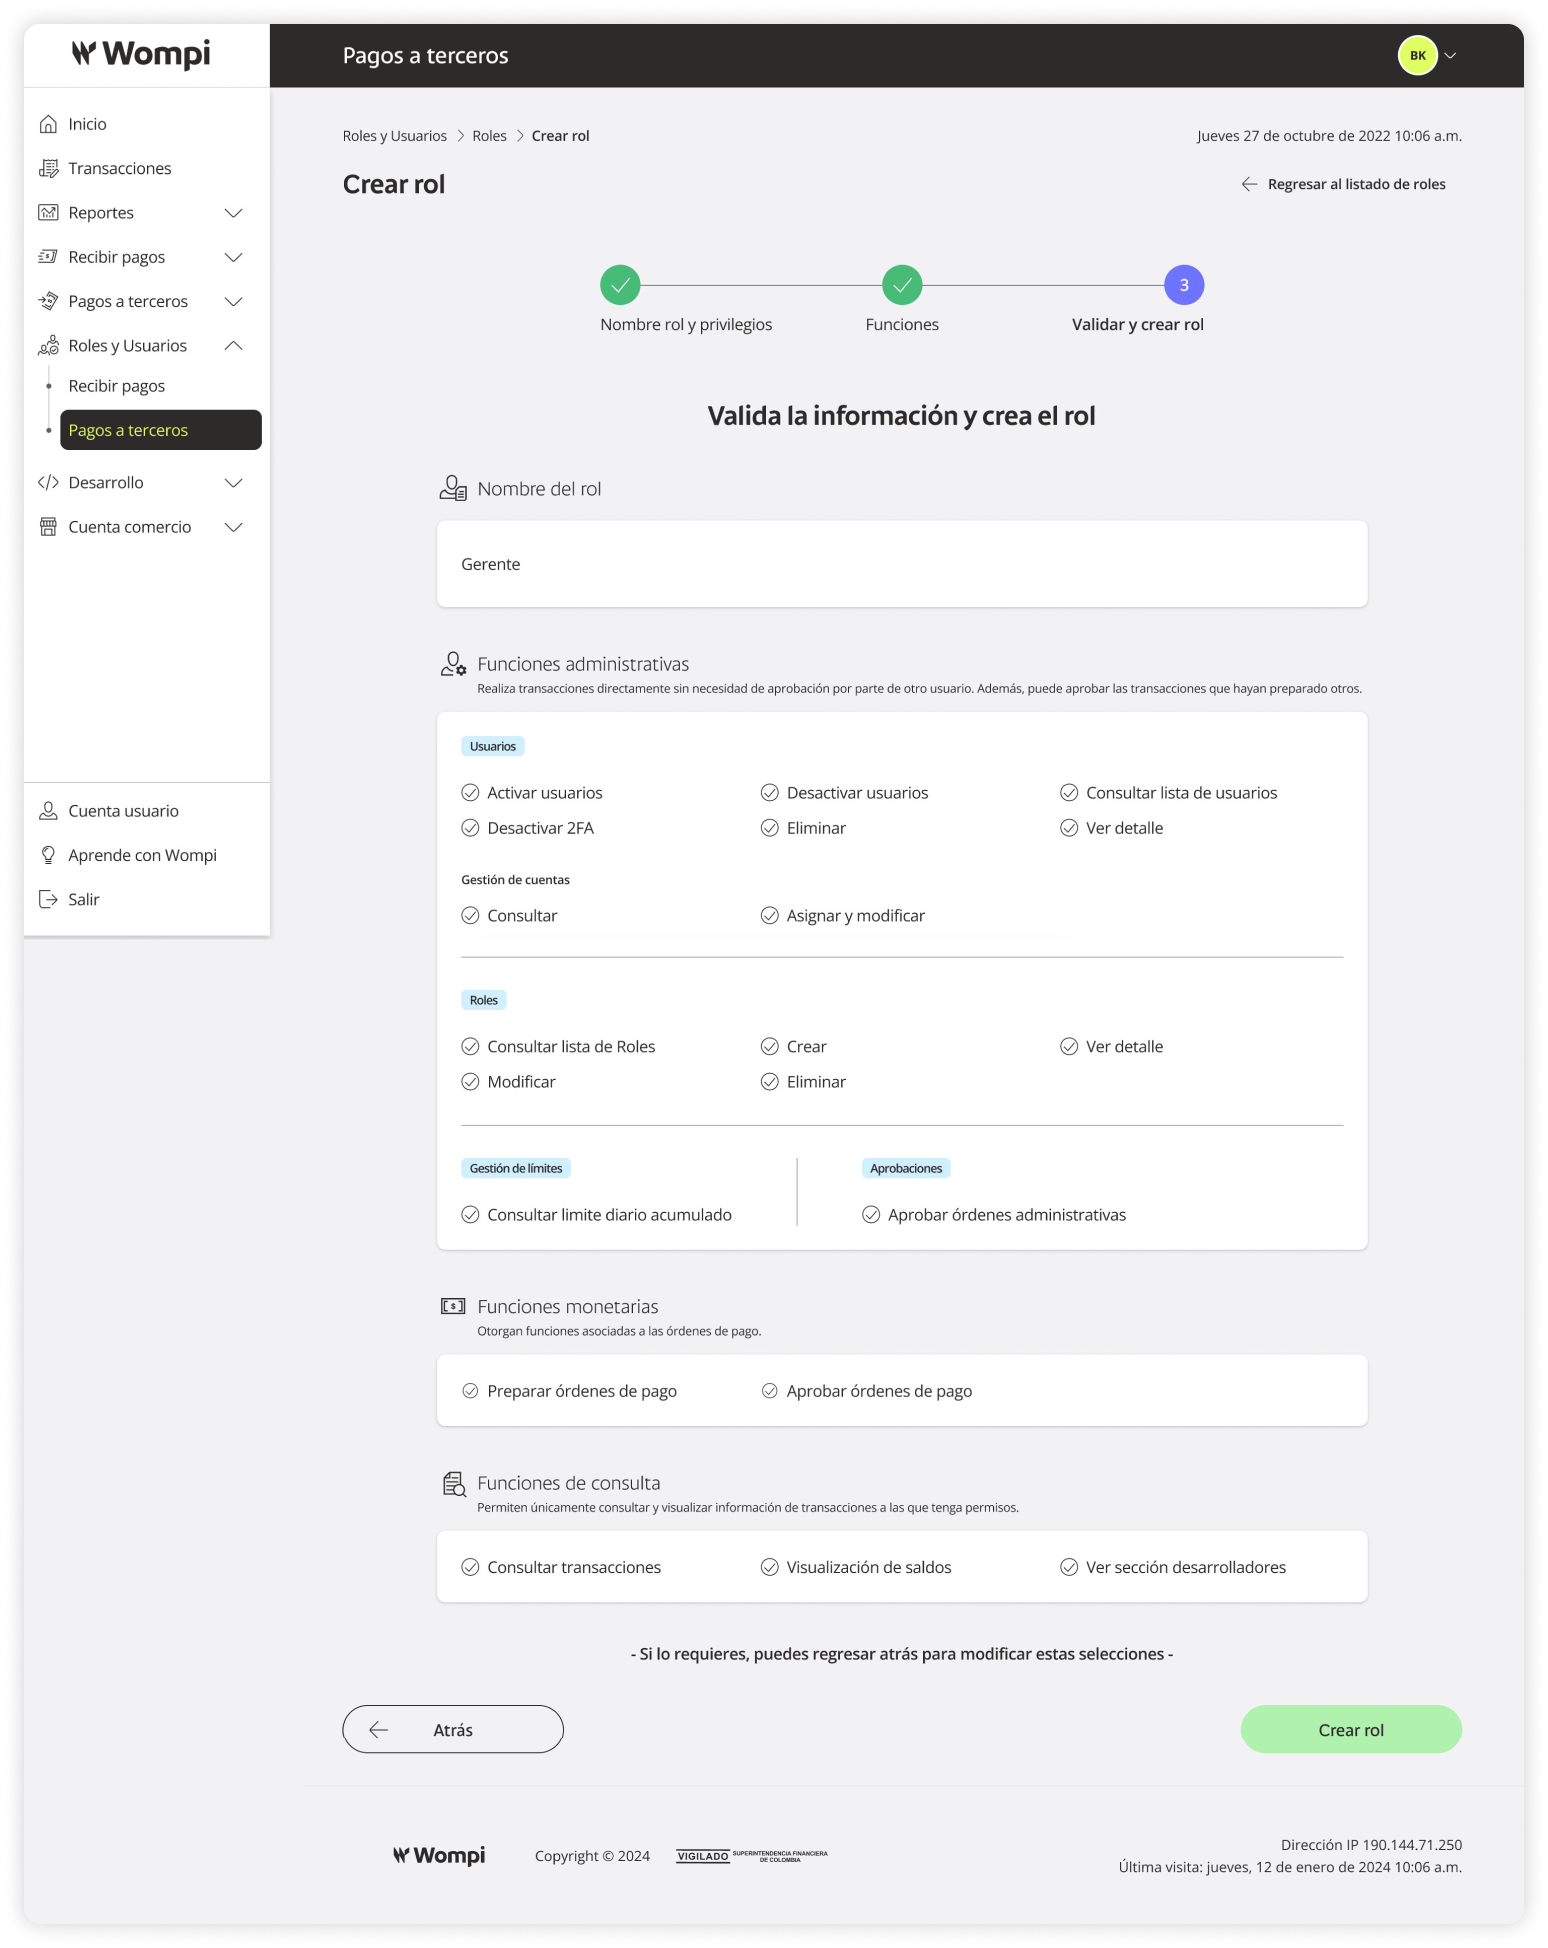
![]() In the final step, you'll see a summary of the role you're about to create.
In the final step, you'll see a summary of the role you're about to create.
If everything looks correct, click Create role. If you need to make changes, click Back.
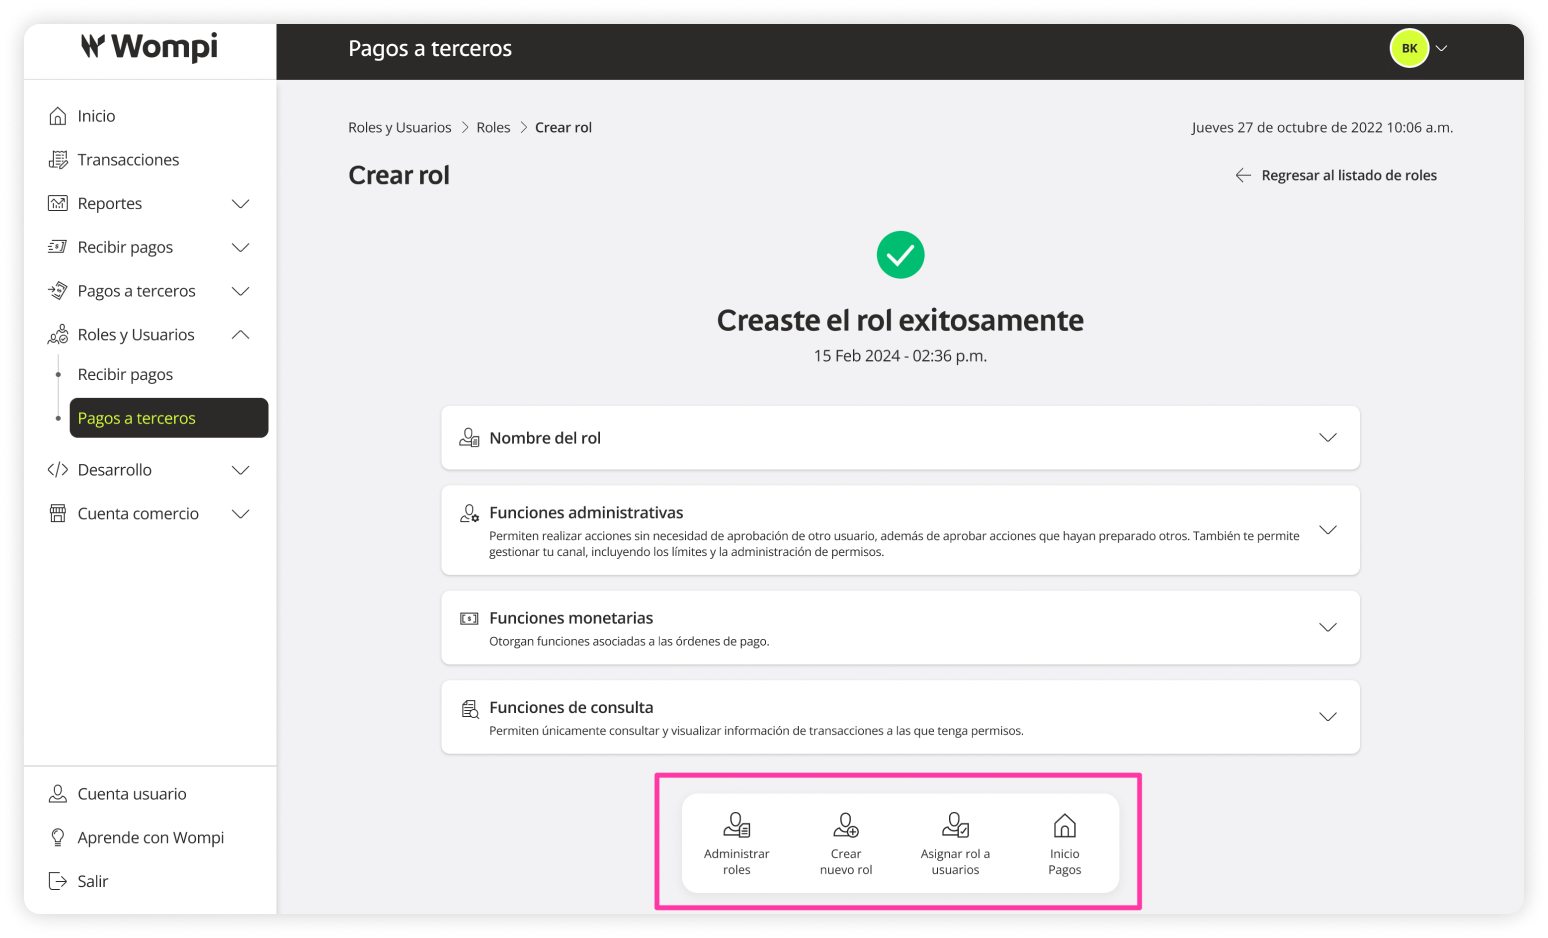
![]() You’ll see a confirmation and summary of the created role.
You’ll see a confirmation and summary of the created role.
You can now:
- Manage roles
- Create a new role
- Assign roles to users
- Go to Third-party payments homepage
View/Edit a Role
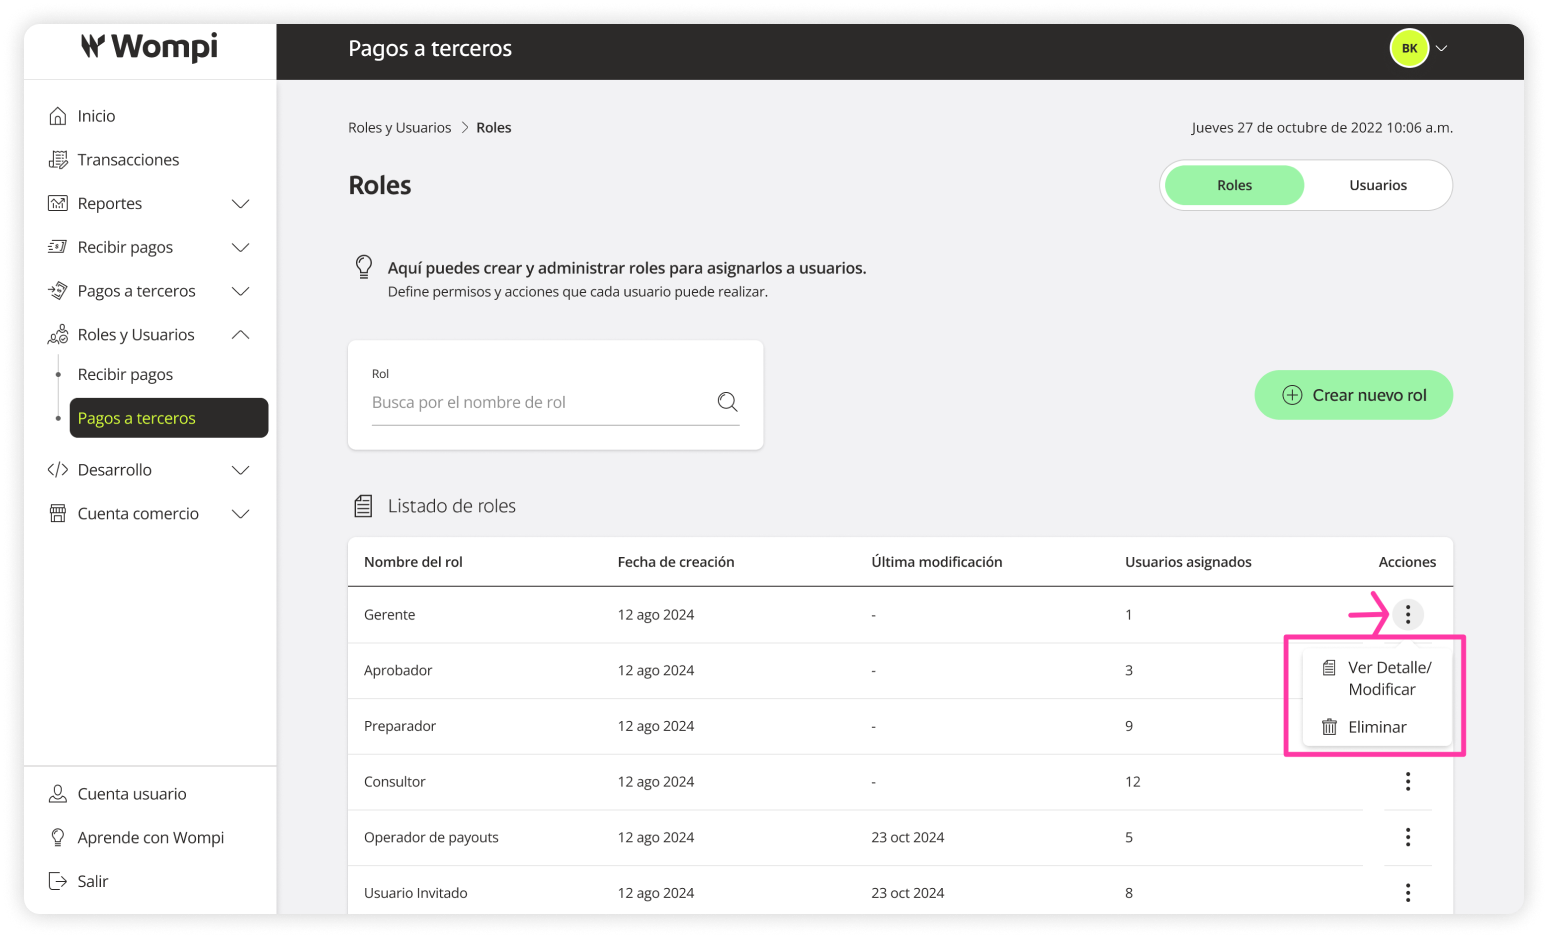
![]() In the Roles section of Third-party payments, click the Actions column and select View Details/Edit.
In the Roles section of Third-party payments, click the Actions column and select View Details/Edit.
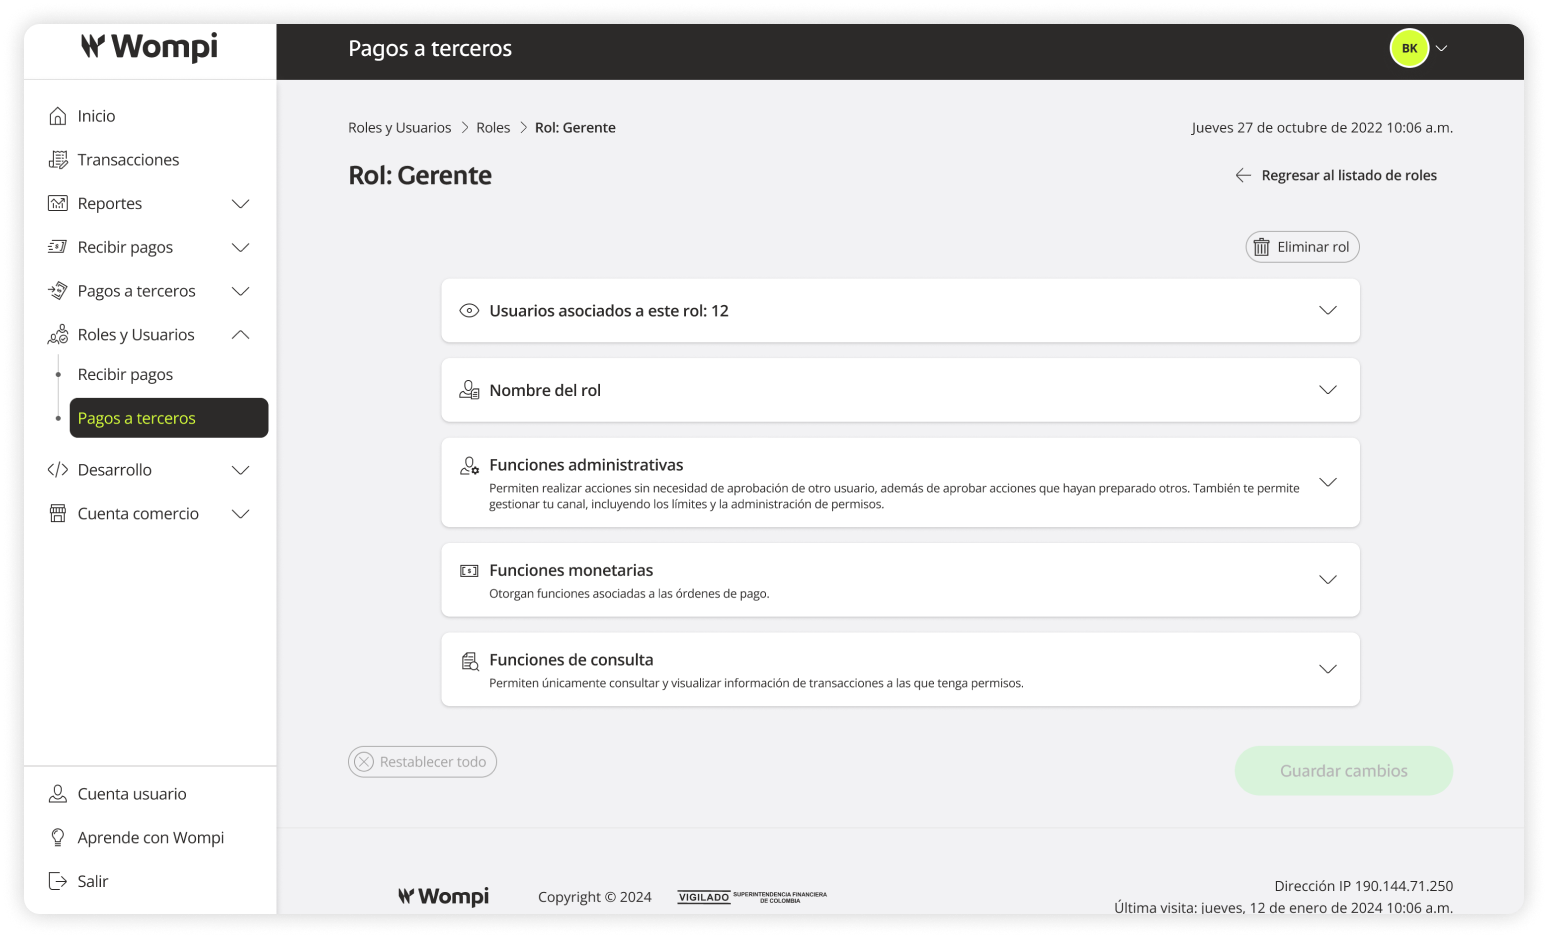
![]() In the role details, you can view and edit the following:
In the role details, you can view and edit the following:
- Users assigned to the role (to change a user’s role, do it from their user detail).
- Role name
- Administrative functions
- Monetary functions
- Read-only functions
Delete a Role
You have two options to delete a role:
![]() In the Roles section of Third-party payments, click the Actions column, select Delete, and confirm.
In the Roles section of Third-party payments, click the Actions column, select Delete, and confirm.

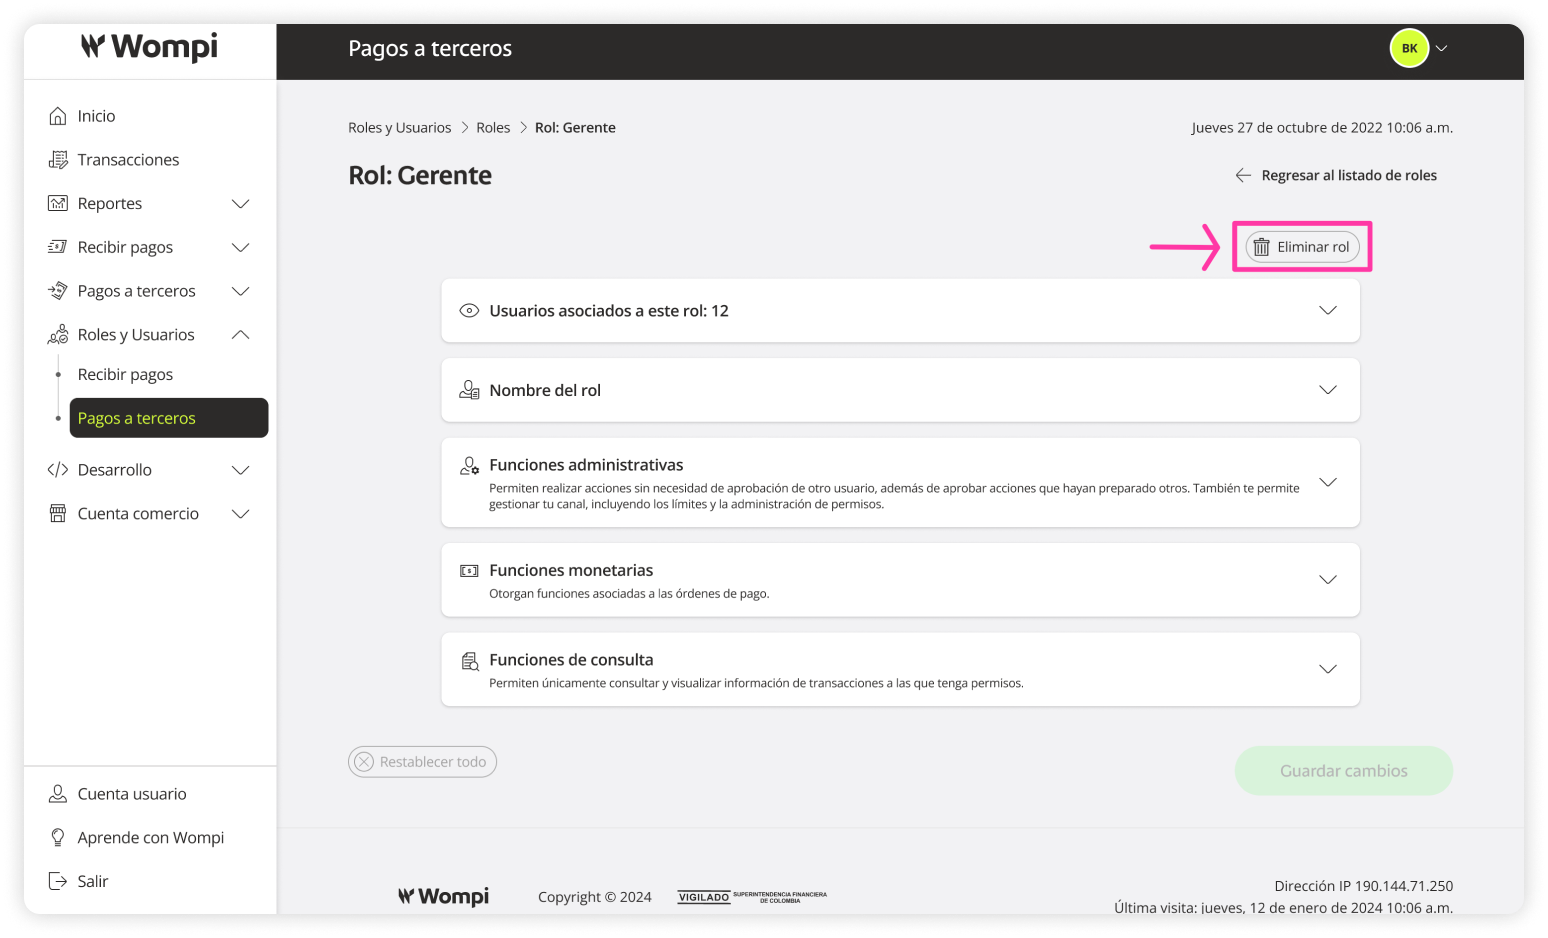
![]() In the Roles section, click the Actions column and select View Details/Edit.
In the Roles section, click the Actions column and select View Details/Edit.

Inside the role details, click Delete role and confirm.