Recurring report
You can create a recurring report, you can customize it by giving it a periodicity and information that best suits you.
Required permissions
- Be the owner of the business account (by default you already have a 'SuperAdmin' role).
- Be a user who is assigned a role with 'Manage custom reports and Download reports' permissions.

To give permissions to a new user to the reporting, you have to take into account when creating roles and users, check the option in reports ("manage custom reports" and if you want them to be able to download them check the option to "download reports"), so that this new user can have these functionalities.

Creation of recurrent reports

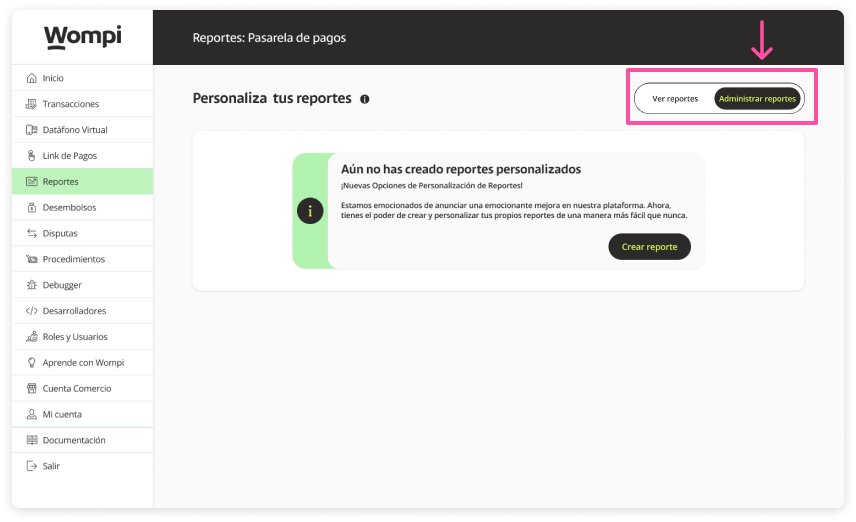
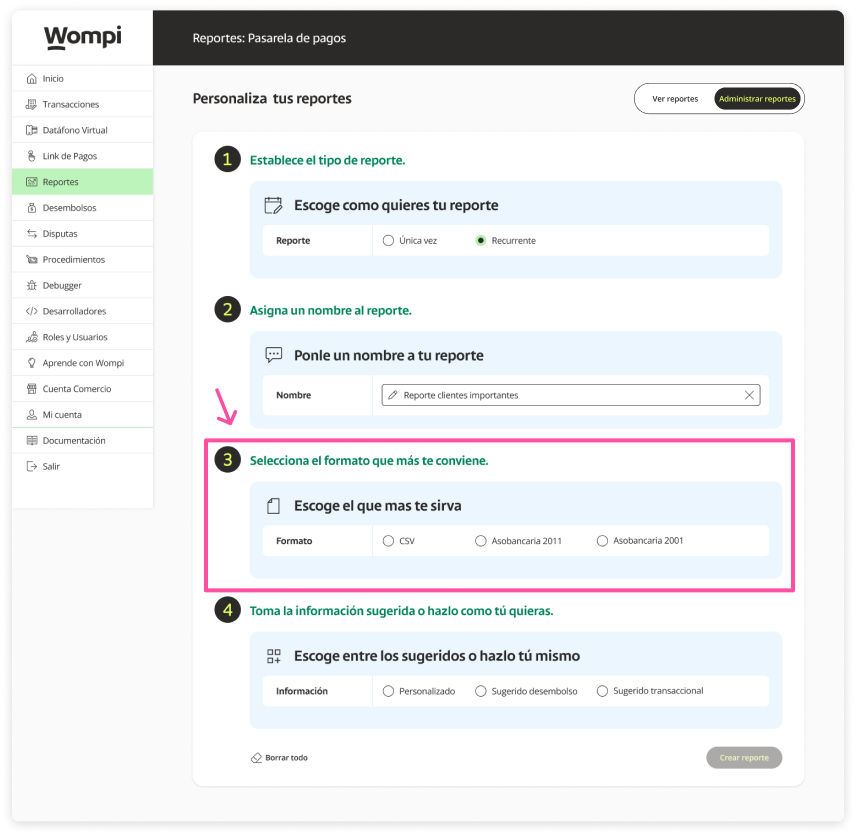
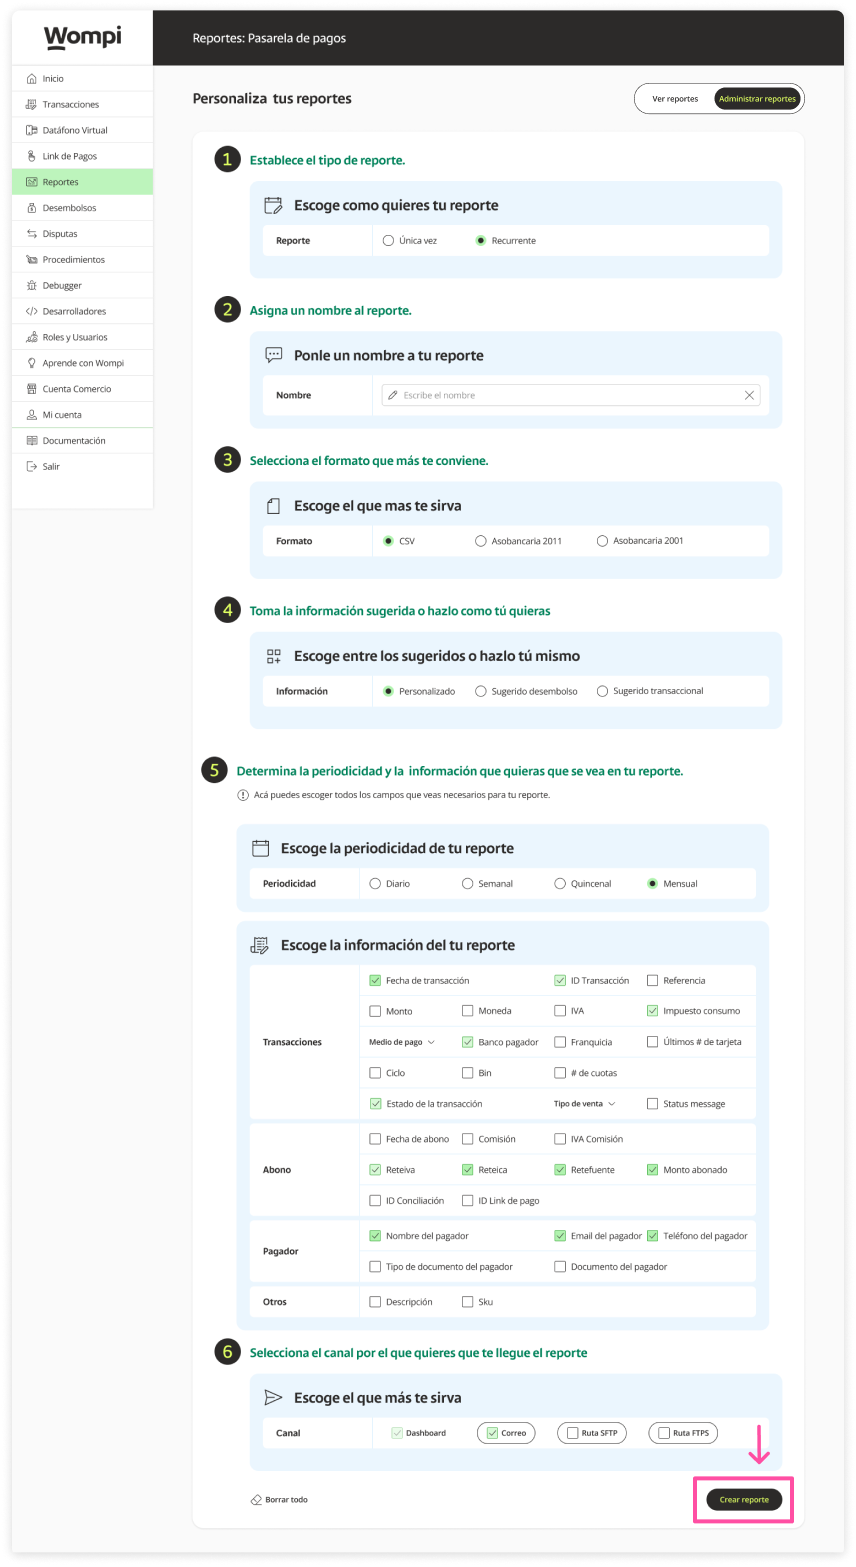
In the Reports section, go to the Create reports section.

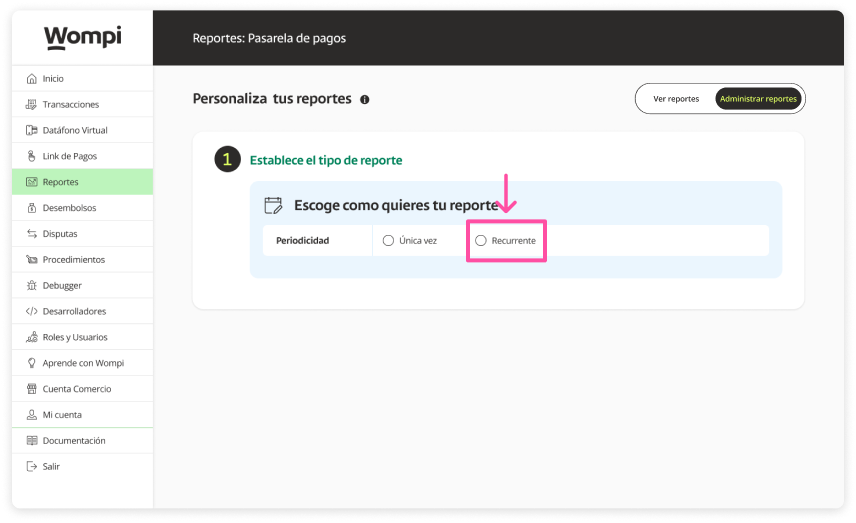
Select the 'Recurring' option.

You will be enabled (steps 2 - 3 - 4), where you can select the corresponding information, continue with step 2 assigning a name to the report.
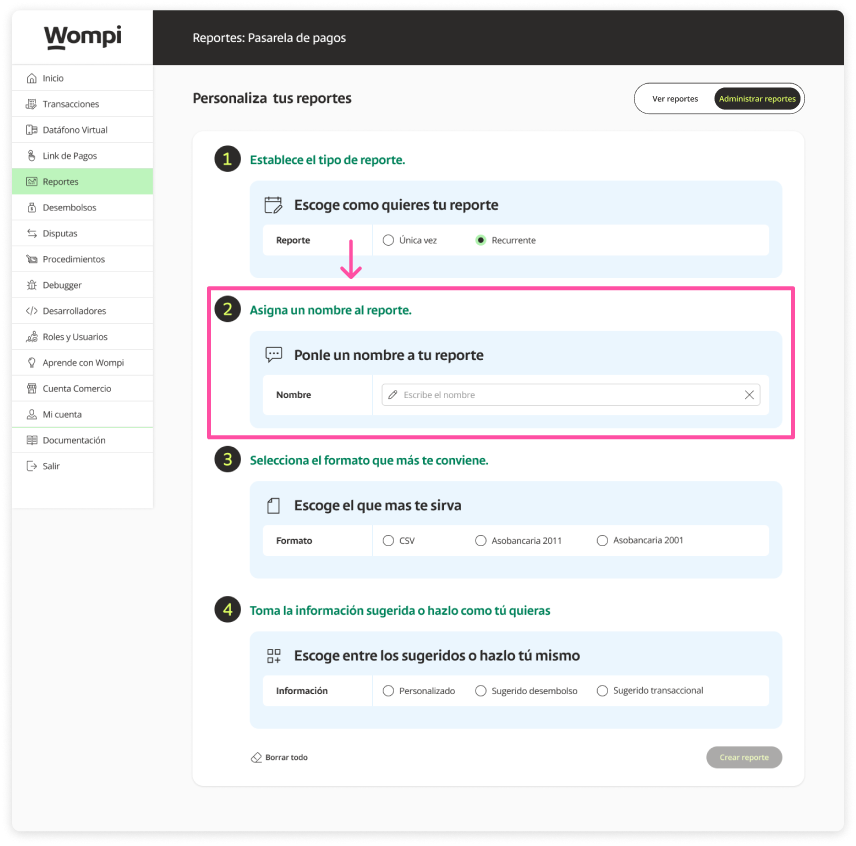

Select the format in which you want to receive the report.

Keep in mind: If you select any Asobancaria format, it will automatically mark the information corresponding to this format. If you choose CSV format you will be able to customize the information for the report.

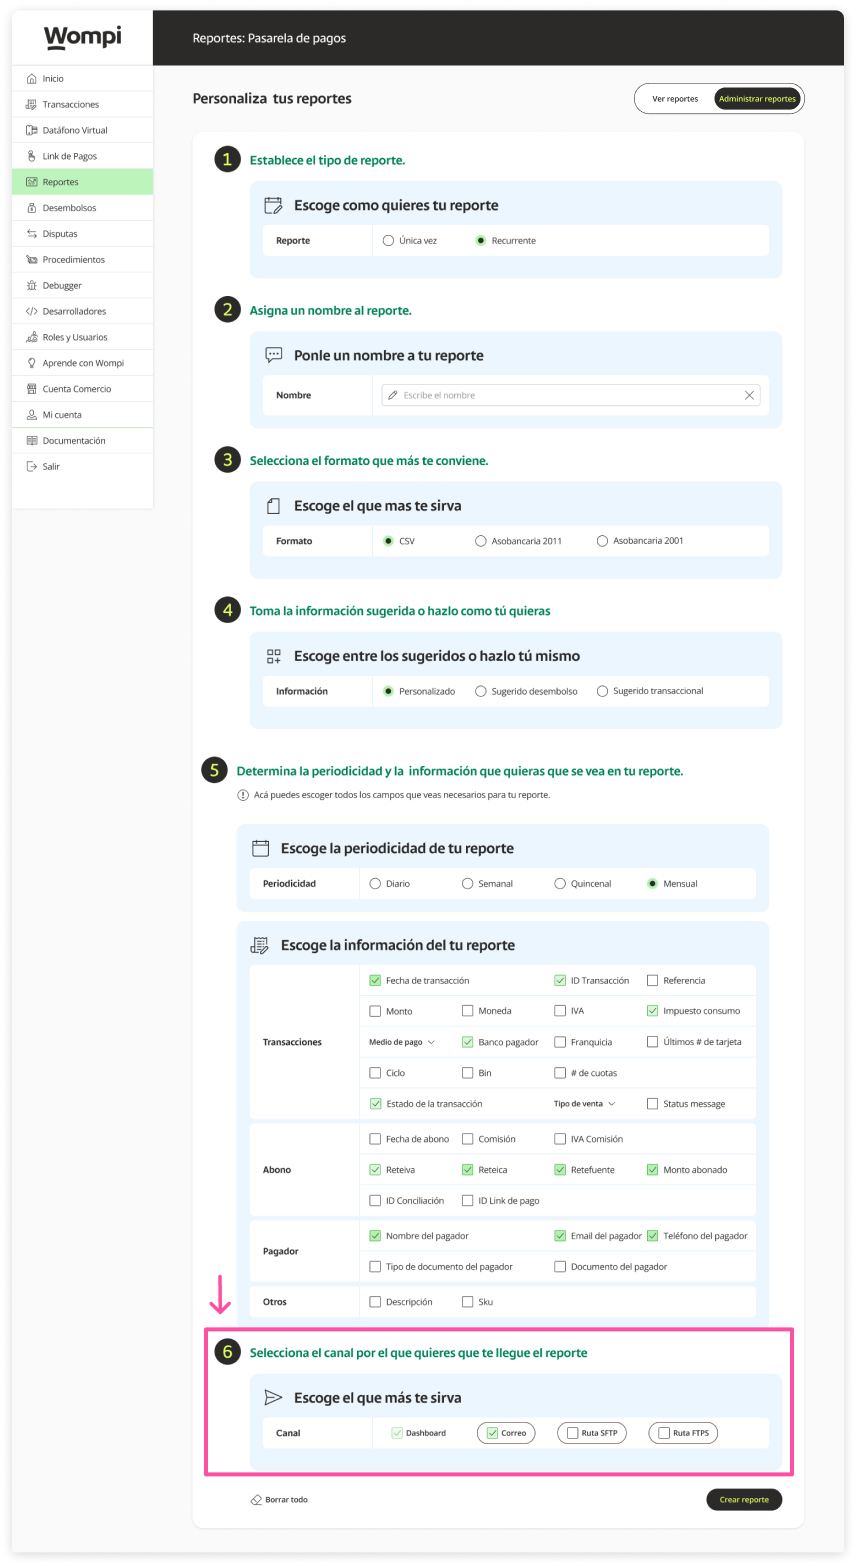
Select the type of information you want to appear in the report.
Keep in mind: If you select custom, you can choose the information yourself. And if you select any suggested one, it will load the default information for each of these.


Select the channels through which you want the report to reach you. By default, the dashboard and main email of the business are already selected, you can add more emails so that the report reaches them and also configure SFTP and FTPS routes.
Keep in mind: If you select any suggested one, the information that you will receive in the report will be automatically marked.
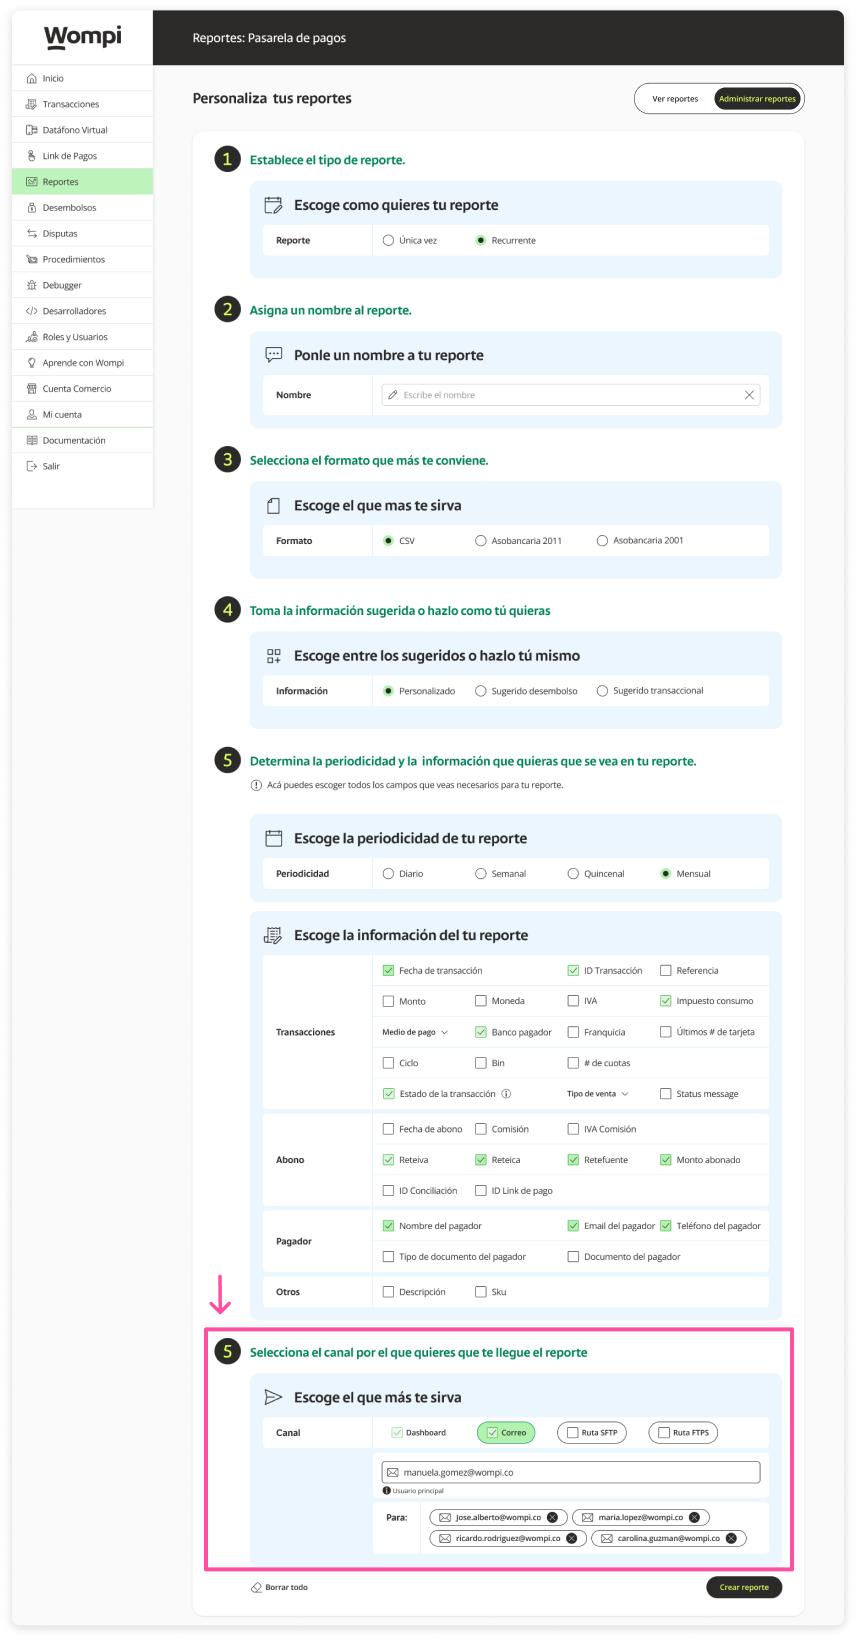
Email: By default, the main email of the business will appear but you can add more emails.
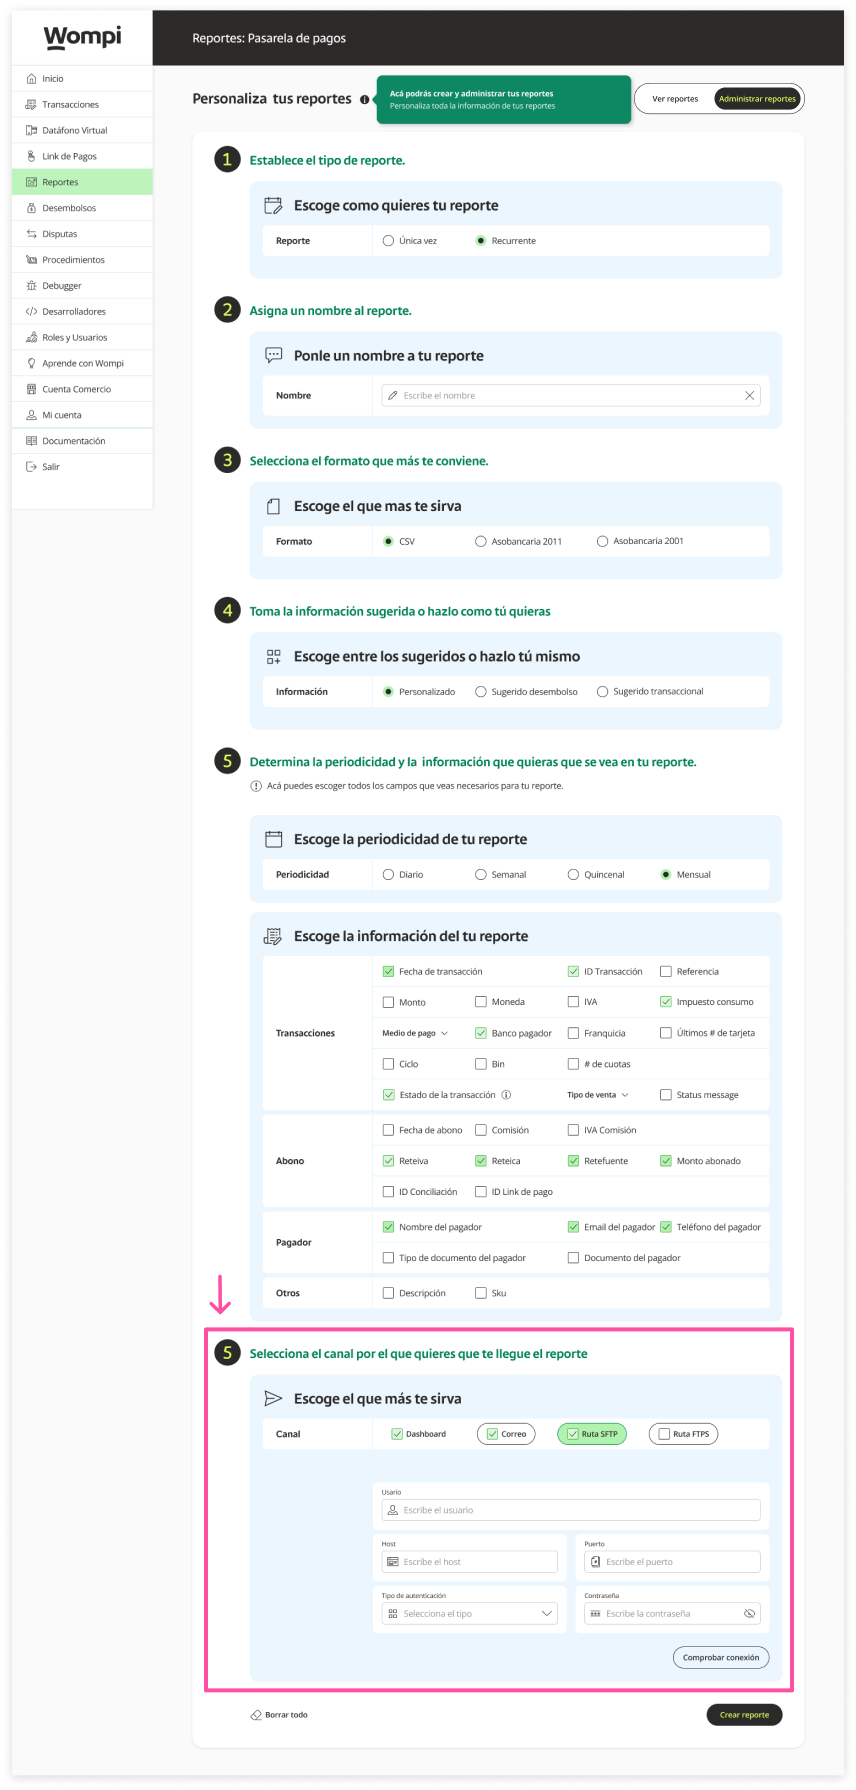
SFTP/FTPS routes: Here you can configure and check the connection and information for the routes.

Once the fields with the information have been selected, click on the 'Create report' button.

Subsequently, a message will appear confirming the creation of the report.
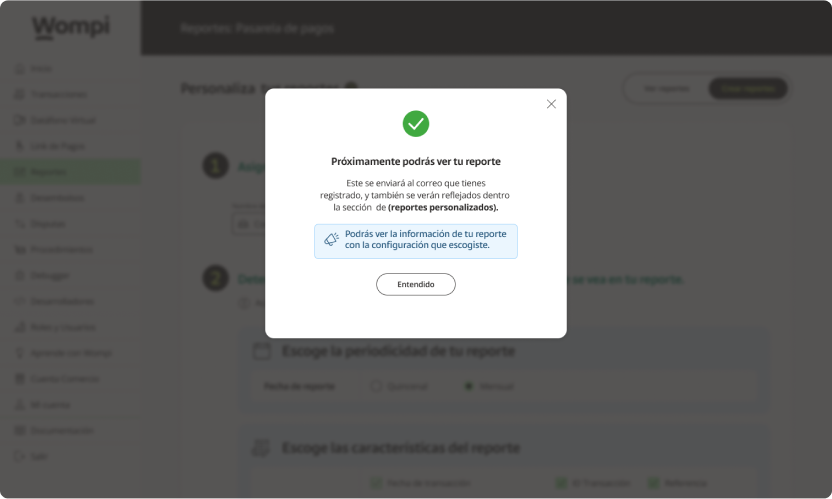

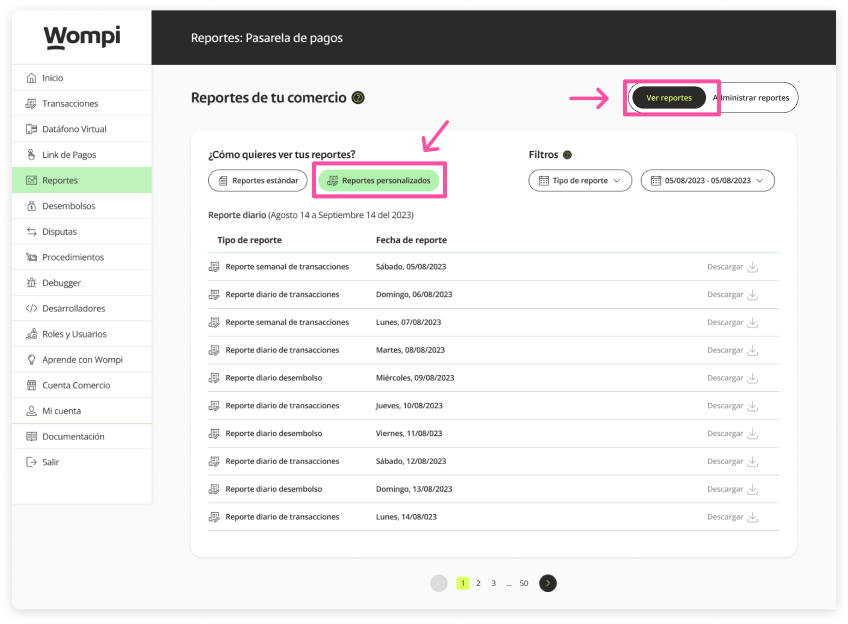
You will be able to see the created report in the list of the 'View reports' / 'Custom reports' section and it will be available when you want to review it.